Welcome to another 9to5Software Premiere Pro tutorial. In this guide, we’re going to teach you how to grab frames from your video footage using various methods. Before we move on to how to do it, let’s get started with what it is:
Download latest version of Adobe Premiere Pro

What is a frame freeze in premiere pro?
Frame freezing in Adobe Premiere Pro, sometimes also called “Frame hold,” is the process of generating a static image from footage you have in your timeline. Other names for the same features include export still and pause video effect. There are various reasons you might want to do that. You might be telling a story in your video, and you want to pause at a certain moment, point out a detail in your footage by freezing a frame, etc.
How do you create a freeze-frame effect?
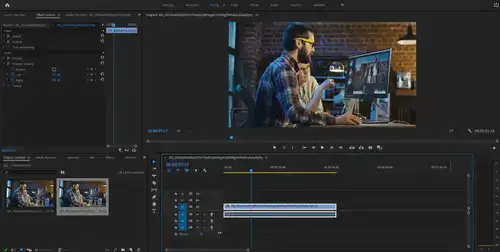
1. Import your media.
First of all, import the media file to your sequence.
2. Find the exact frame you’d like to grab and extent.
Make sure your timeline is on the exact moment you want to freeze.
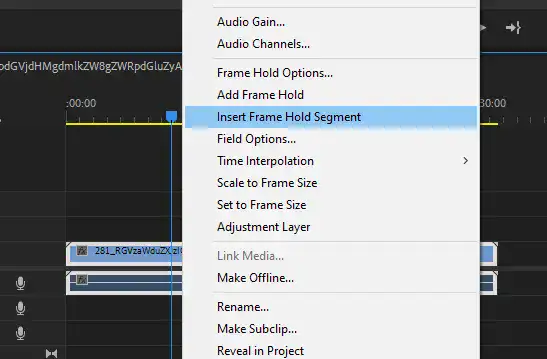
3. Insert Frame Hold Segment
Once you are on the right frame, click right on your footage, and from the menu, find the “Insert Frame Hold Segment” option.
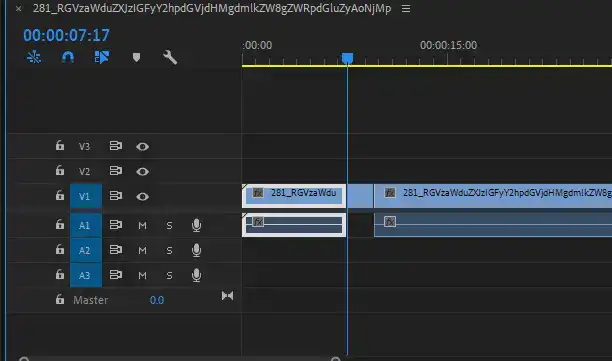
4. Determine your frozen frame’s length
Soon as you click on the button, you’ll notice a still image right where you wanted it. By dragging it to either side, you can decide how long the still image you’ve taken from the footage will be. Its default length is 2 seconds.
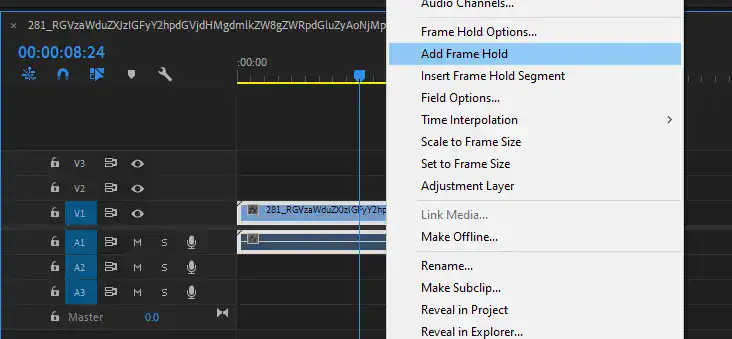
BONUS METHOD
Alternatively, instead of clicking on “Insert Frame Hold Segment”, you could right-click on your footage and select “Add Frame Hold”. What it does is, that PP cuts the clip at that exact moment and then applies that framework to the rest of your footage.
BONUS METHOD #2
While you’re previewing your clip in your timeline, you could click on the “Export Frame” option shown in the red circle below or click (CTRL + Shift + E) to activate it.
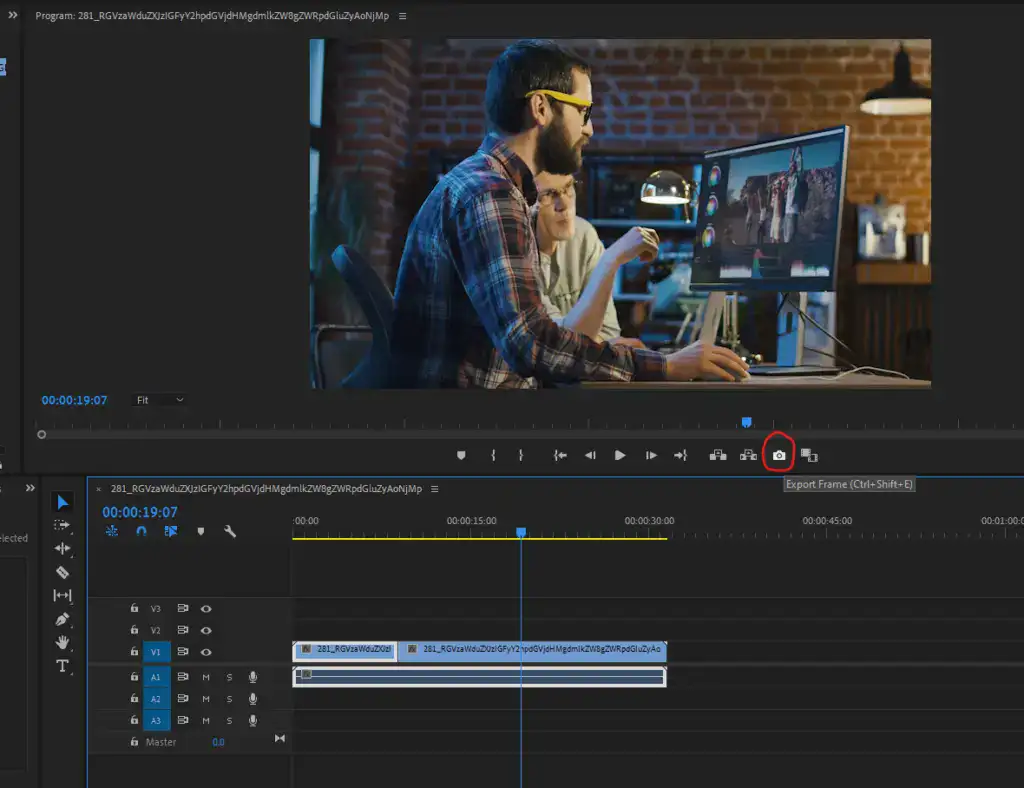
Unlike freezing the frame within the video, this function lets you export a selected frame to your PC and save it as a JPEG, JPG, or PNG.
If you select the “Import into project” option, it’ll save it to your Premiere Pro library, which you can use as a still image at a later time.
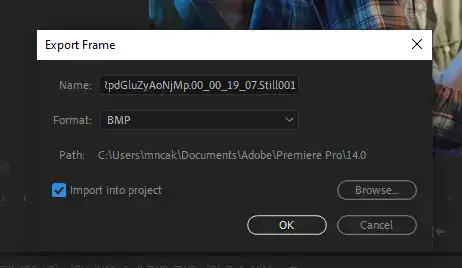
When you wish to use the still image in your project, drag and drop it into your sequence and define its length by extending it. One of the best use cases for this function is using the frame as a thumbnail when creating a video for YouTube. It saves us a lot of time.
Can you do a freeze-frame in Premiere rush?
Yes! Similar to Premiere Pro, Premiere Rush also lets you take still images from your footage and freeze frames. Simply find the frame you’d like to freeze, then Choose Clip > Video Options > Frame Hold. It’ll instantly generate a still image.
How do I extend the last frame in Premiere Pro?
Bring your timeline to the last frame of your footage and then right-click on the video, select Insert Frame Hold Segment, or Add Frame Hold. We suggest you use Add Frame Hold because it’ll turn the rest of your footage to the selected frame, which you can later extend to bring it to the desired length.
This is all for this tutorial, everyone. Thank you so much for reading. Are there any methods we forgot to mention? Or do you know a better way to freeze-frame within Adobe Premiere Pro?
Please let us know in the comments and share your insights with the rest of the world.
