In the digital age, few tools are as ubiquitous in creative and professional circles as Adobe Photoshop. Renowned for its exceptional editing capabilities, it has become an indispensable tool for photographers, designers, and marketers worldwide. As with any powerful software, however, maintaining performance is crucial to seamless use.

When using Photoshop, you might encounter situations where the program starts to slow down or performs less efficiently than usual. This situation often results from the accumulation of cache files, which are essentially stored data that the software uses to quickly access frequently used information.
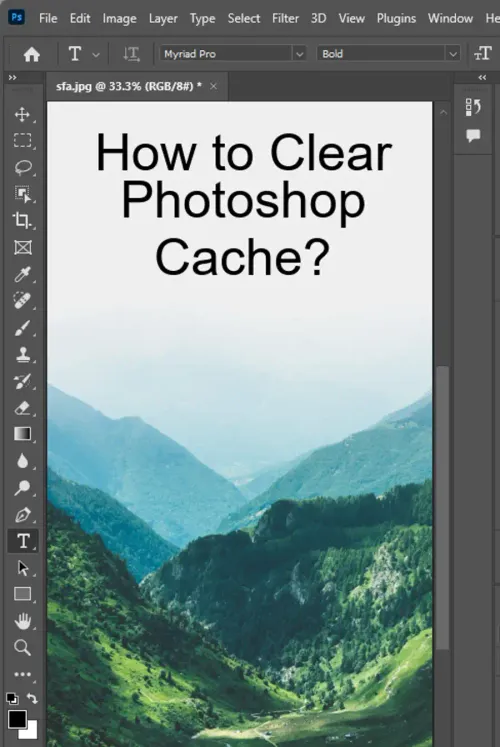
In this blog post, we'll walk you through the comprehensive steps on how to clear your Photoshop cache to keep your program running smoothly and efficiently.
What is Photoshop Cache?
Before we dive into how to clear your Photoshop cache, it's crucial to understand what it is. Photoshop cache is essentially a component of your computer's Random Access Memory (RAM) that Photoshop uses to store and quickly retrieve data that is frequently accessed. This data can include elements such as layers, histories, or patterns, which Photoshop can then recall faster than if it were to fetch them anew each time.
While this helps to boost the software's performance, over time, as these cache files build up, they can take up a significant amount of space on your system, thereby causing the program to run slower.
How to Clear Photoshop Cache
Clearing your Photoshop cache is a relatively straightforward process that can significantly improve your program's efficiency. Here's how you can do it:
Method 1: Using the Purge Function
Open Photoshop: Launch your Photoshop application on your computer.
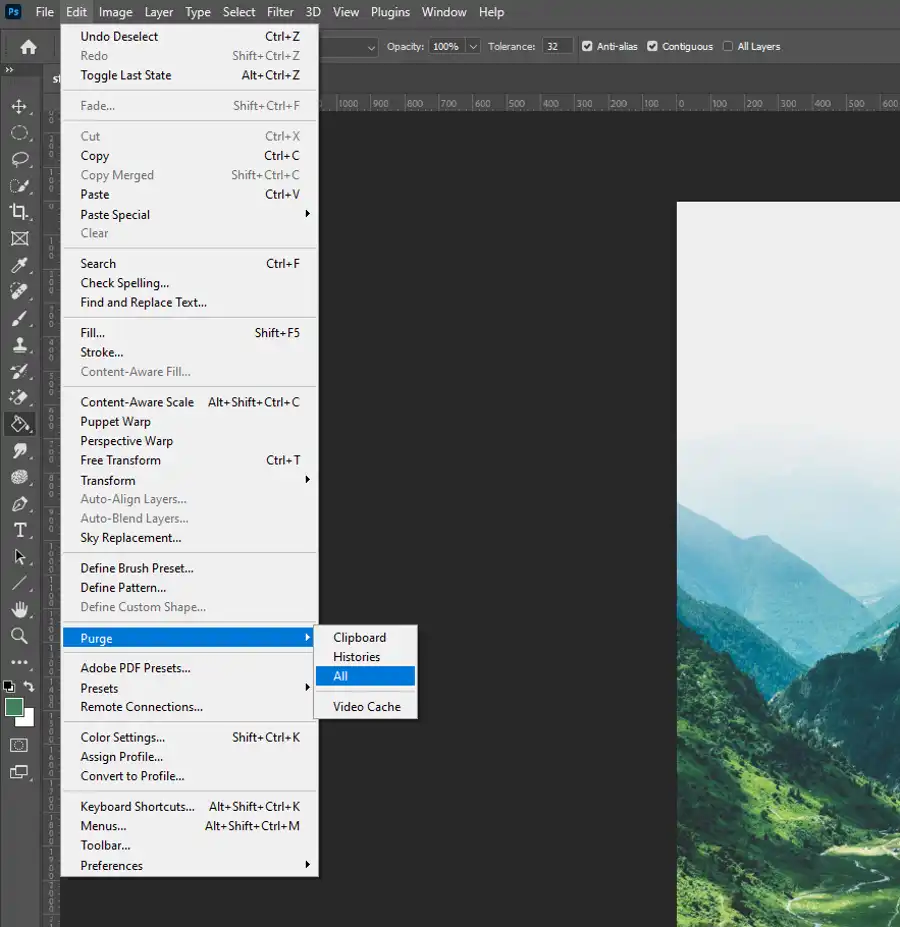
Open the 'Edit' Menu: Navigate to the top of your screen and click on the 'Edit' option.
Navigate to 'Purge': In the dropdown menu, hover over the 'Purge' option. This will open up a sub-menu that allows you to choose what specific cache to delete.
Select the Cache to Purge: You will see options like 'Undo', 'Clipboard', 'Histories', 'All' and 'Video Cache'. Choose the one you want to delete. If you select 'All', it will clear every cache file.
Note: Keep in mind that this operation cannot be undone. Hence, ensure that you've saved your work before proceeding.
Method 2: Adjusting Performance Preferences
You can also free up cache by adjusting Photoshop's performance preferences. Here's how:
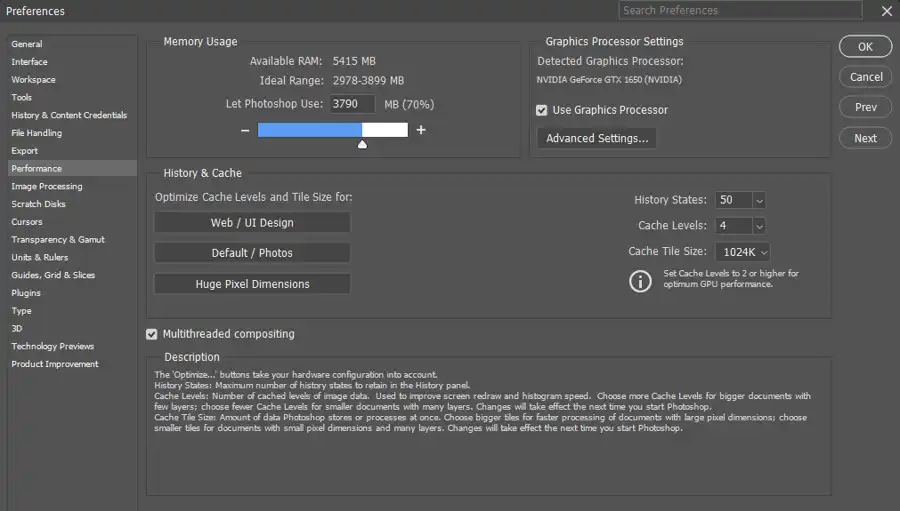
Open Photoshop and Navigate to 'Preferences': Go to the 'Edit' menu, then drop down to 'Preferences', and select 'Performance'.
Adjust the Memory Usage: In the 'Performance' dialog box, you can adjust the 'Memory Usage' by reducing the percentage of RAM allocated to Photoshop.
Edit History & Cache: In the same 'Performance' dialog box, you'll find the 'History & Cache' settings. Here, you can change the number of history states (i.e., the number of operations you can undo) and the cache levels.
Click 'OK' to Apply Changes: Once you're satisfied with your adjustments, click 'OK' to apply the changes.
Method 3: Delete Temporary Files
In some cases, Photoshop might not be clearing its temporary files. These are files the software uses and then discards, but sometimes they don't delete properly. To manually delete these files:
Close Photoshop: Ensure Photoshop is completely closed.
Open Your Temp Folder: The location of this folder varies depending on your operating system. For Windows users, you can type '%temp%' into the search bar. For Mac users, open the 'Finder', click on 'Go' in
the top menu, hold down the 'Option' key, and select 'Library'. Then navigate to 'Caches' -> 'TemporaryItems'.
- Delete Photoshop Temp Files: Look for files starting with 'Photoshop' or 'pst'. Select these files and delete them.
Remember to be careful when deleting files from your system. Do not delete anything you're unsure about.s
Conclusion
Clearing your Photoshop cache is an essential practice for maintaining the software's performance and ensuring your work continues to run smoothly. By regularly purging cache files, adjusting performance preferences, and manually deleting temporary files, you can optimize Photoshop's performance and enhance your overall user experience. Always remember to save your work before carrying out these operations to prevent any loss of your projects.
So, the next time you notice a slow-down in your Photoshop performance, consider performing a quick cache cleanup. It might just be the solution you need!
Questions you might be asking
Should I clear Photoshop cache?
Yes, you should clear Photoshop cache periodically to ensure optimal performance. Over time, cache files can accumulate, causing slow-downs and glitches in the program. Clearing the cache can free up space and prevent these issues from occurring.
What happens when you clear cache on Photoshop?
When you clear the cache in Photoshop, temporary files are deleted. These files include previews of images, temporary copies of opened files, and other data that Photoshop uses to speed up performance. By clearing the cache, you can free up space on your computer and improve the program's speed and stability.
Where is my Photoshop cache?
Your Photoshop cache location depends on your operating system and the version of Photoshop you are using. On Windows computers, the cache can typically be found in the C:\Program Files\Adobe\Adobe Photoshop (version)\Plug-ins\Panels\Cache folder. On Mac computers, it is usually located in the /Users/(username)/Library/Caches/Adobe/Adobe Photoshop (version)/Caches folder. However, if you are unsure of where your cache is located, you can generally find the location by searching for "Photoshop cache" in your computer's search bar or by consulting the Adobe Photoshop documentation.