As with other types of filters, the distort filters in Photoshop can be used to manipulate images in various ways. This allows users to create unique and interesting effects on their images. Distort filters are a set of tools that can be used to alter and manipulate any given image or specific areas of an image in various ways. In this article, we will be focusing on three known distort filters in Photoshop - Displace, Liquify, and other distortion filters.

Applying Displace Filter
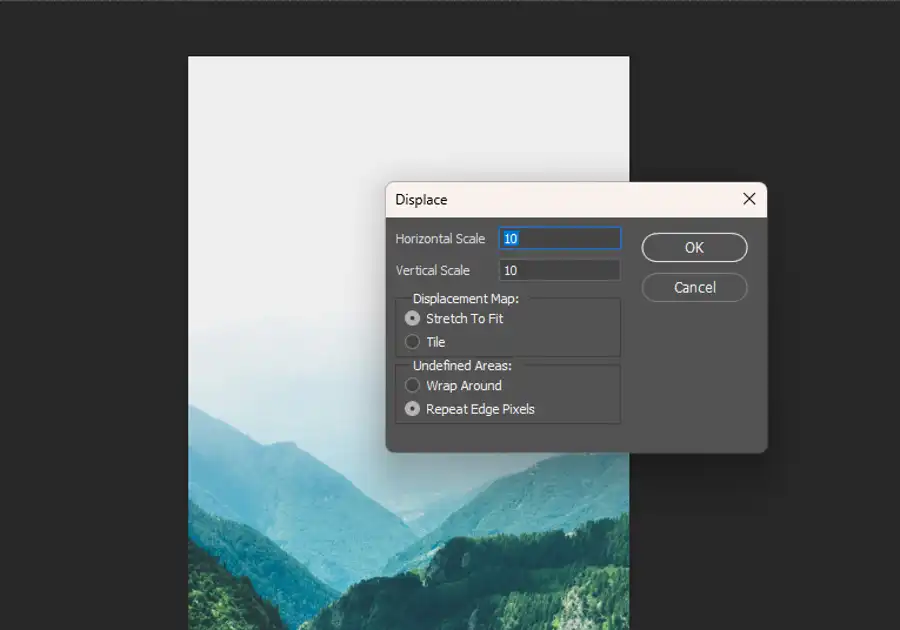
The Displace filter is one of the more advanced distortion filters offered by Photoshop. It allows users to distort images based on a displacement map, which dictates the manner in which the image will be distorted.
- To apply the Displace filter, first, select Filter > Distort > Displace. It will then display a dialog box asking how much to displace the image and which displacement map to use.
- Once you define the magnitude of displacement and select your displacement map, Photoshop will apply the Displace filter to your image.
Applying Liquify Filter
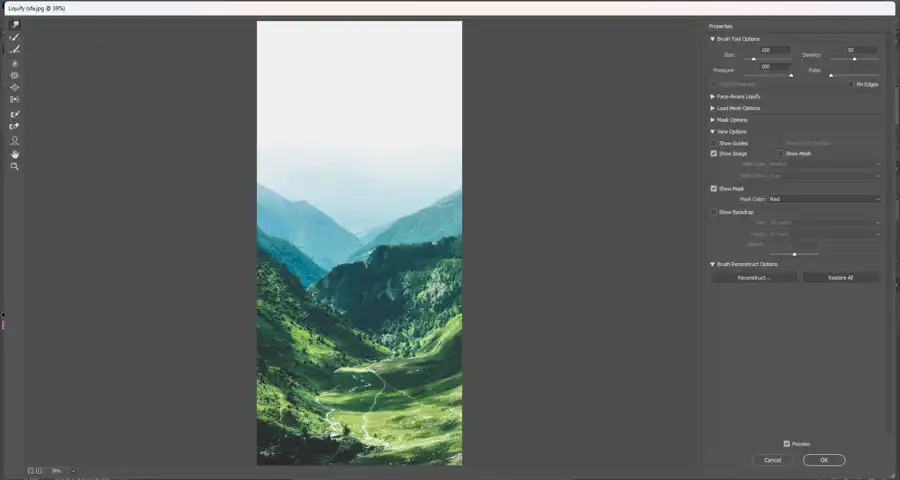
The Liquify filter offers tools to warp, twirl, expand, contract, shift, or reflect areas of an image. It can be used to straighten rectangular objects, make composites of different photos, reposition body parts, textures, and improve the final result.
- To apply the Liquify filter, select Filter > Liquify. Or use CTRL + SHIFT + X shortcut.
- A new Liquify dialog box will open, displaying a range of tools to choose from on the left side of the screen. Select a tool of your choice and adjust its size and pressure, before clicking 'OK'. The Liquify filter offers advanced tools such as the Forward Warp, Freeze Mask, and Thaw Mask.
Other Distort Filters in Photoshop

In addition to the previous filters, Photoshop also offers a variety of other distortion tools such as Diffuse Glow, Glass, Ocean Ripple, Pinch, Polar Coordinates, Ripple, Shear, Spherize, Twirl, Wave, and ZigZag. These filters can be found in Filter > Distort and can be adjusted to achieve different effects in your images.
Advanced Techniques in Distorting Images in Photoshop
Photoshop has various tools that can be used to distort images in different ways. Some tips and tricks for those aiming to master the distort tools include using the Warp tool to curve objects, Puppet Warp to move body parts with more control, and Liquify to perfect the end result.
To make precise selections, you can use Lasso or Quick Selection tools, which can be found under the Edit menu.
For advanced retouching such as seamlessly blending multiple images together, you can make use of Clone Stamp. The Clone Stamp tool allows users to copy one area of a photo and apply it to a different area in the same photo.
Final Words
Distort filters offer a range of tools in Photoshop that allow for the creation of unique and interesting effects in images. These filters can be used to warp, shift, expand or contract parts of an image and can be applied either to the whole image or to specific areas. Displace and Liquify filters are some of the more advanced distortion filters available in Photoshop. By using the tips and tricks outlined in this article, you can perfect your distort tool skills and take your image manipulations to a new level.
Questions you might be asking
How do I warp an image shape in Photoshop?
To warp an image shape in Photoshop, first, select the image layer that you want to warp. Then, go to the Edit menu and choose the Transform option. Here, select the Warp option. After that, you can click and drag the gridlines to modify the shape of your image. You can also adjust the anchor points to control the level of distortion.
How do you skew and distort in Photoshop?
To skew and distort in Photoshop, select the layer you want to transform, go to Edit > Transform, and then choose the Skew or Distort option. In the Skew mode, you can adjust the angle of the top or bottom of the layer by dragging the anchor points. In Distort mode, you will have more control over different corners of the layer. Click and drag the anchor points around the edges of the layer to bend and warp it to your liking.
How do I stretch distortion in Photoshop?
To stretch distortion in Photoshop, select the layer you want to modify, go to Edit > Transform, and choose the Warp option. Here, you can click and drag various anchor points to create different distortions. To stretch a distortion, move the anchor points outward from the center of the area that you want to stretch. You can also use the gridlines to create more precise stretches. Keep in mind that stretching too much can make the image look unnatural, so use it carefully.
Keyboard Shortcut for filters in Photoshop?
To access filters quickly in Photoshop, use the keyboard shortcut Command + F (Mac) or Control + F (Windows).