Turning your photos into black and white can bring out the dramatic elements of the scenes or subjects you've captured. It helps to focus on composition, light, and textures, revealing the deeper essence of the image. Adobe Photoshop, a powerful image editing software, offers various methods to convert colored photos into black and white. In this guide, we'll dive into the process and teach you step-by-step how to make a photo black and white in Photoshop.

Preparing Your Image
Before starting, ensure that your image is in the right format. Ideally, you should be working with a JPEG or RAW format to retain the maximum information possible from your photograph.
- Open Adobe Photoshop and go to
File > Open, then navigate to the photo you want to convert to black and white. - Once the photo is open, it's a good idea to duplicate the original layer to keep it untouched. To do this, select the background layer in the 'Layers' panel, right-click, and select
Duplicate Layer.
Method 1: Using the Black and White Adjustment Layer
Step 1: Add a Black and White Adjustment Layer
To add an adjustment layer, go to the Layer menu in the top menu bar. Navigate to New Adjustment Layer > Black & White. This will open up a new panel where you can control how different colors are converted to shades of gray.
Step 2: Adjust the Color Sliders
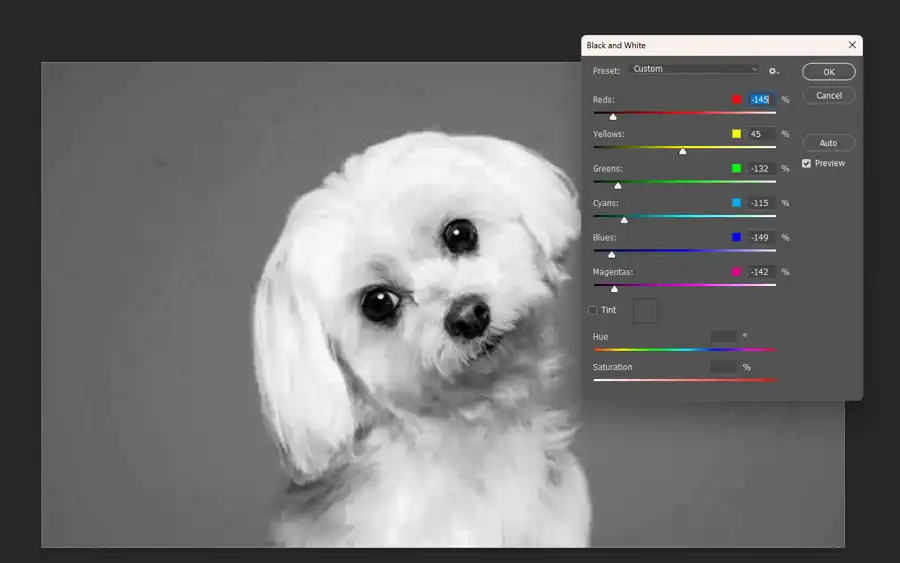
Within the Black & White properties panel, you will see six color sliders - Reds, Yellows, Greens, Cyans, Blues, and Magentas. Drag these sliders to change the brightness values of these colors when they are converted to grayscale. Each color slider will affect the corresponding colors in your image, allowing for deep customization of your black and white conversion.
Method 2: Using the Channel Mixer
The Channel Mixer is another powerful tool for converting images to black and white, offering control over how much each color channel contributes to the final output.
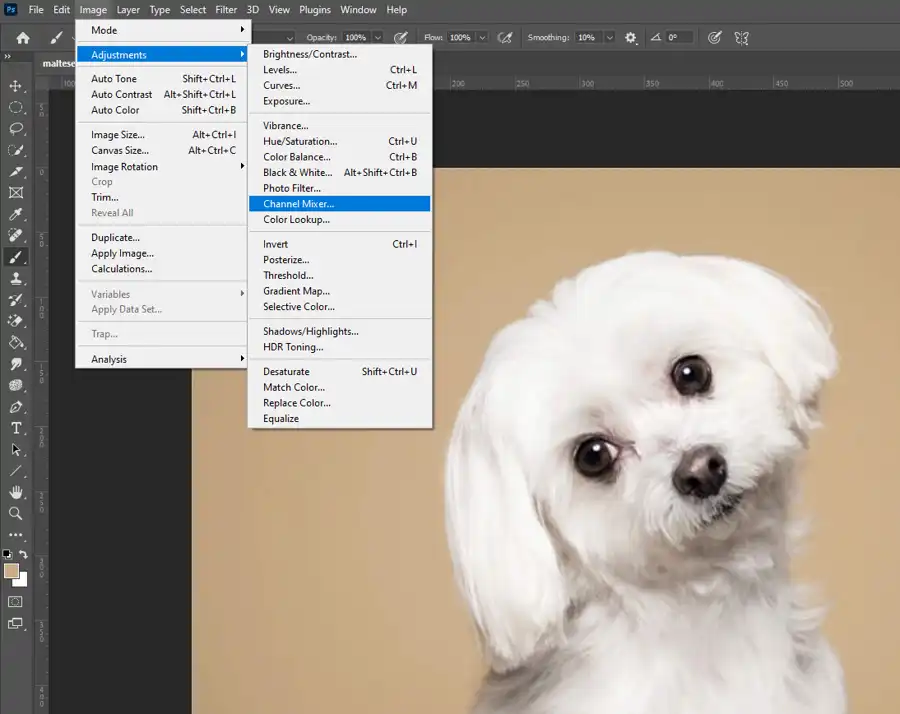
Step 1: Add a Channel Mixer Adjustment Layer
Go to the Layer menu, navigate to New Adjustment Layer > Channel Mixer.
Step 2: Choose Monochrome
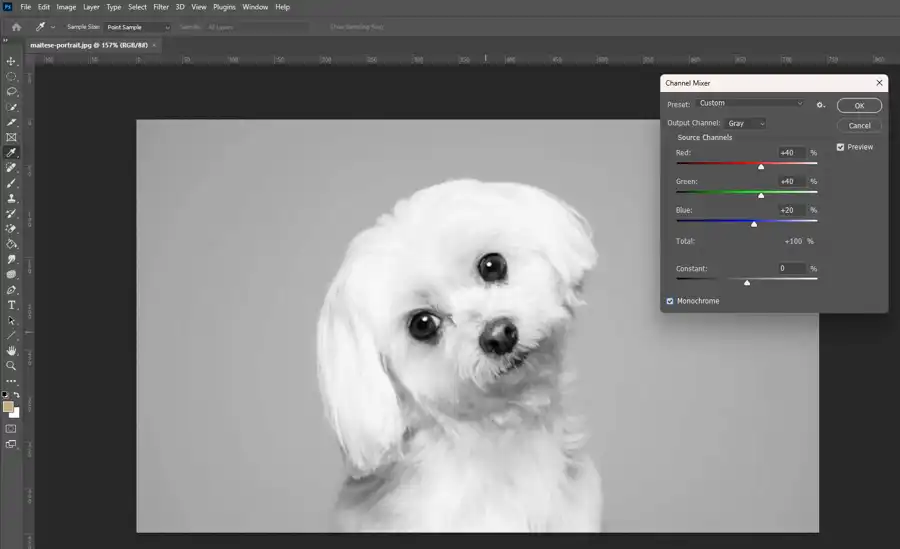
In the Channel Mixer panel, check the Monochrome box at the bottom. The image will turn black and white.
Step 3: Adjust the Color Channels
You will see sliders for Red, Green, and Blue channels. By adjusting these sliders, you can control how each color channel influences the grayscale image. The total of these values should ideally add up to 100% to maintain the same brightness in the photo.
Method 3: Using the Gradient Map
A Gradient Map applies a grayscale gradient to your photo based on the luminance values of your original image.
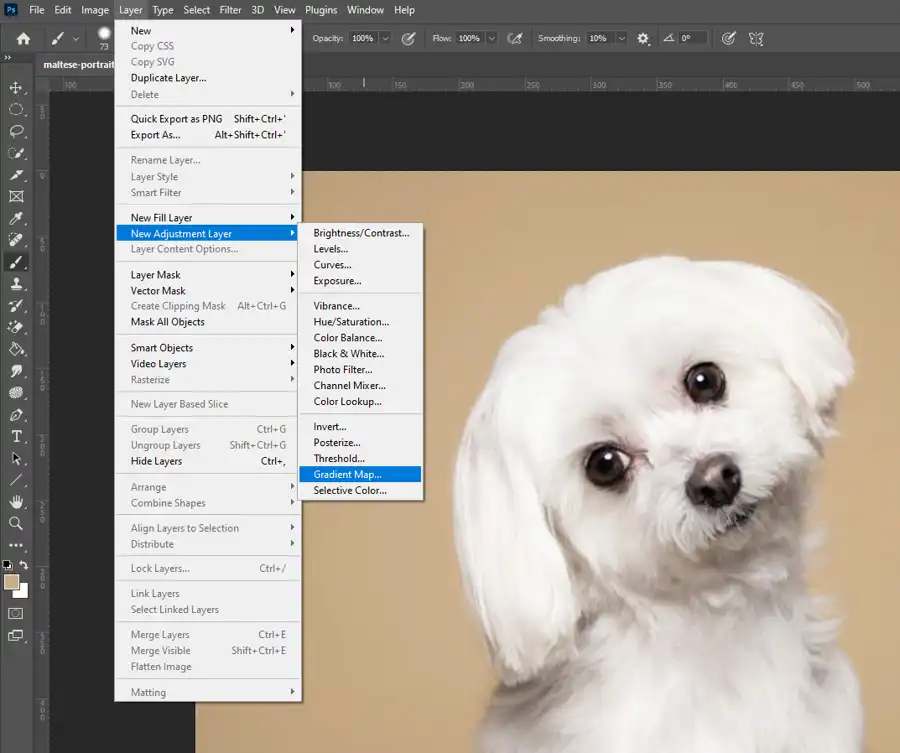
Step 1: Add a Gradient Map Adjustment Layer
Go to Layer > New Adjustment Layer > Gradient Map.
Step 2: Choose a Gradient
By default, the Gradient Map applies a gradient that may not be grayscale. To choose a black to white gradient, click on the gradient in the Gradient Map panel to open the Gradient Editor. Select the black to white gradient (usually the third one from the left) and click OK.
Final Thoughts
By now, you should be able to turn a colored photo into black and white using three different methods in Photoshop. Each method offers its own degree of control over the grayscale conversion process. Depending on your needs, you can choose the most suitable one.
Remember, converting a photo to black and white doesn't end with turning off the colors. It's just the beginning of a creative journey. You can further enhance your black and
white images by adjusting brightness, contrast, clarity, and applying various effects to make your photos truly stand out.
Black and white photography opens up a whole new world of creativity, allowing you to highlight emotions, shapes, and patterns in a unique way. With these skills in hand, go forth and explore the beauty of the world in black and white!
Questions you might be asking
How do you convert a photo to black and white in Photoshop?
To convert a photo to black and white in Photoshop, you can follow these simple steps:
- Open your image in Photoshop.
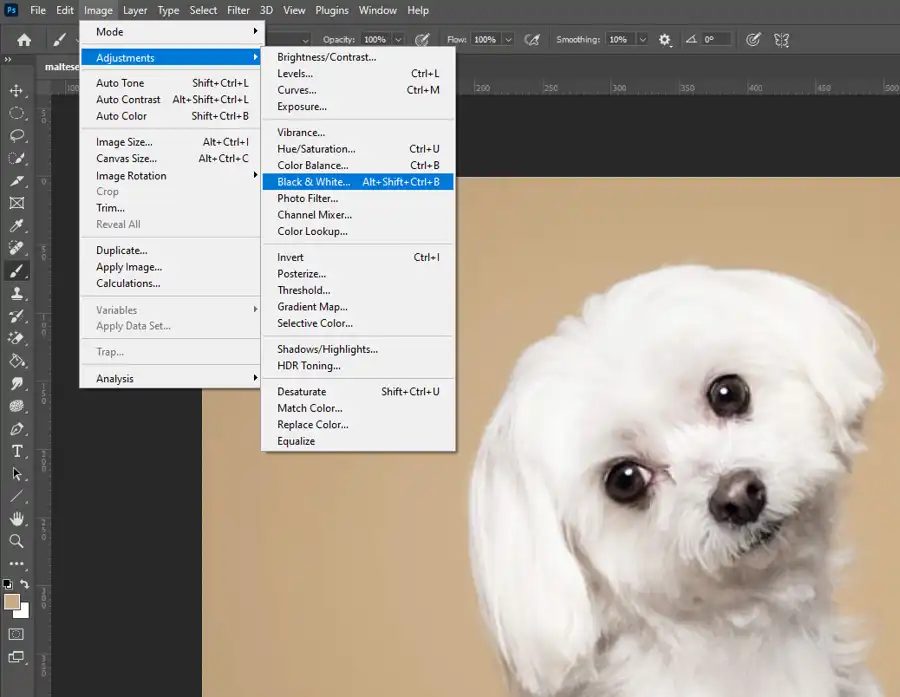
- Go to the Image menu at the top and select the Adjustments option.
- From the Adjustments option, select the Black & White adjustment layer.
- Adjust the sliders to get your desired black and white look.
- Save your image.
How do I turn a picture into black and white?
You can easily turn a color photo into a black and white image with the help of Photoshop. You just need to open your photo in Photoshop, go to the Image menu, and select the Adjustments option. From there, select the Black & White adjustment layer and adjust the sliders to get your desired black and white look. Once you're happy with the result, save the image.
What is the shortcut to make an image black and white in Photoshop?
There is no specific shortcut to make an image black and white in Photoshop. However, you can use keyboard shortcuts to quickly access the adjustments panel. By pressing Ctrl+Shift+Alt+B (Windows) or Cmd+Shift+Option+B (Mac), you can quickly access the Black & White adjustment layer and start adjusting the sliders to convert your image to black and white.
Can you do black and white in Photoshop?
Yes, Photoshop is a powerful image editing software that provides a wide range of tools to convert color images to black and white pictures. You can use the Black & White adjustment layer to easily convert your color images to black and white. Additionally, you can use various other tools and techniques such as desaturation, grayscale conversion, and duotone effects to create stunning black and white photos in Photoshop.