Cropping and straightening photos is an essential technique for creating beautiful compositions that capture the essence of the scene you're trying to depict. Fortunately, Adobe Photoshop has an incredibly powerful tool to help you make these necessary adjustments with ease.

Use the crop tool
The Crop tool in Photoshop is a versatile option that allows you to adjust the size and proportions of your image quickly. With intuitive visual guides and real-time feedback, the Crop tool makes it easy to create a well-balanced composition. You can adjust the aspect ratio and choose from a variety of presets or create your custom options.
When you select the Crop tool in Photoshop, the Overlay Options feature will enable you to choose from a variety of overlays to help you compose your image. These overlays include the Rule of Thirds, the Grid, and the Golden Ratio, all of which are designed to help you create a well-balanced photo composition.
Beyond providing visual guides for composition, Crop Options provides settings for Classic mode, auto center, and crop shields. Additionally, Photoshop's Crop tool is non-destructive, which allows you to delete cropped pixels or retain them to optimize the crop boundaries later.
One of the coolest features of the Crop tool is the Content-Aware Fill on Crop option. This feature leverages the power of Adobe's AI to fill in gaps caused by cropping out areas of an image while preserving as much detail as possible. The result is a seamlessly edited image with all the necessary elements of the photograph.
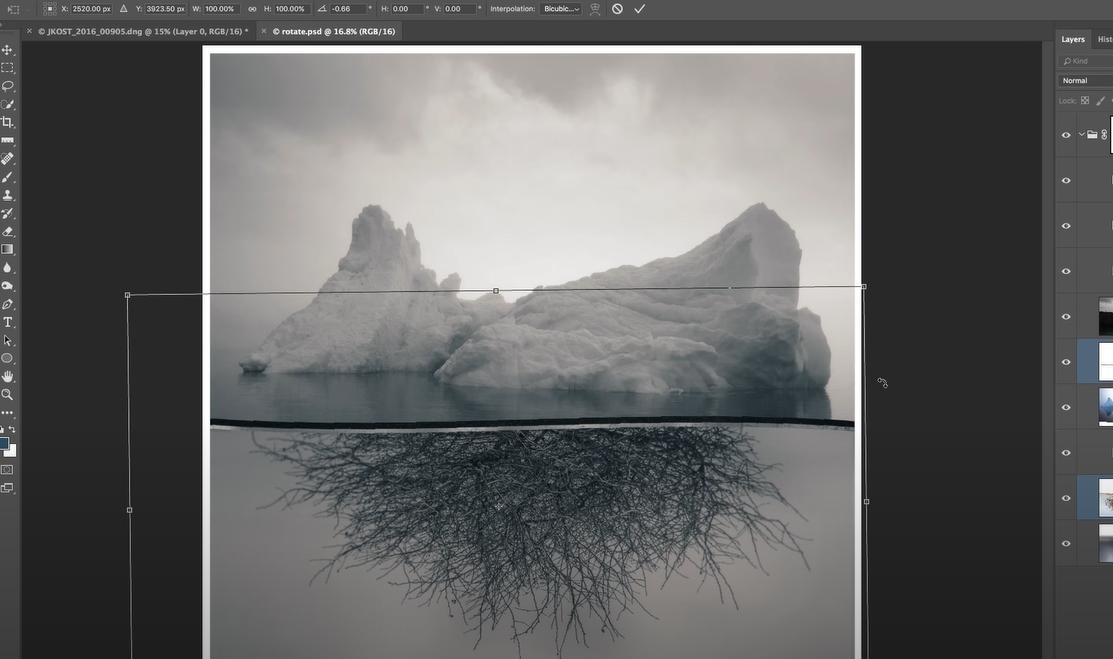
In addition to straightening a photo while cropping using the Content-Aware Fill on Crop feature, you can also use the Transform Perspective feature. This option allows you to adjust the perspective of your photo while cropping, which is especially useful when straightening an image that has been taken with a wide-angle lens or at an irregular angle.
Finally, the Crop tool also allows you to resize the canvas using the Crop tool. Whether you're creating a composite of your favorite vacation snapshots or expanding the background of a photo to suit a different aspect ratio, the Crop tool in Photoshop makes it easy to adjust the size of your image canvas to fit your needs.
In conclusion, the Crop tool in Adobe Photoshop is an incredibly powerful and intuitive tool for cropping and straightening photos. With features like Content-Aware Fill on Crop and Transform Perspective, you can take your photo editing skills to the next level. Give it a try today, and you'll be amazed at the professional-level compositions you can achieve with just a few clicks.
Questions you might be asking
How do I straighten an object in a photo in Photoshop?
To straighten an object in a photo in Photoshop, follow these steps:
- Open your image in Photoshop.
- Select the "Ruler" tool from the toolbar.
- Click and drag a line along the edge of the object you want to straighten.
- Go to "Image" > "Image Rotation" > "Arbitrary" to open the "Arbitrary Rotation" dialog box.
- Photoshop will automatically calculate the angle of rotation needed to straighten the object. Click "OK" to apply the rotation.
How do you straighten a picture?
To straighten a picture in Photoshop, follow these steps:
- Open your image in Photoshop.
- Select the "Crop" tool from the toolbar.
- Click and drag the tool over the area of your image you want to keep.
- Go to "Image" > "Image Rotation" > "Arbitrary" to open the "Arbitrary Rotation" dialog box.
- Photoshop will automatically calculate the angle of rotation needed to straighten the image. Click "OK" to apply the rotation.
- Adjust the crop tool as needed to crop the image to the desired size.
How do I fix my posture in Photoshop?
To fix your posture in Photoshop, you can use the "Liquify" tool. Follow these steps:
- Open your image in Photoshop.
- Select the "Liquify" tool from the toolbar.
- Use the "Forward Warp" or "Pucker" tool to adjust the posture of the subject in the image.
- Use the "Bloat" tool to add volume to areas that need it.
- Use the "Pinch" tool to remove volume from areas that need it.
- Use the "Reconstruct" tool to restore the original shape of the image, if necessary.