When it comes to editing images, Adobe Photoshop is the go-to software for photographers and graphic designers. It's a one-stop-shop for most photo editors, with an array of tools and features suitable for enhancing images and creating beautiful designs. In this article, we'll go over the Clone Stamp Tool in Photoshop, one of the essential tools in photo editing.

What is Clone Stamp Tool?
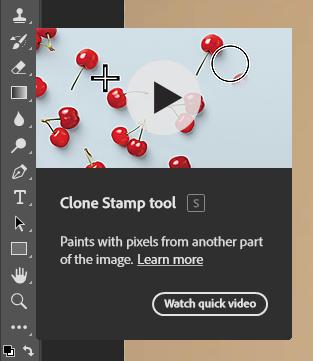
The clone stamp tool is a versatile tool that enables you to copy pixels and apply them to other areas of your image. It's much like copying and pasting, but instead, you do so by painting the content onto a selected area. Photoshop's Clone Stamp Tool is particularly useful in retouching images, removing unwanted objects, or reproducing a damaged area of a photo.
Also relevant: How to clone in Photoshop
When to use the Clone Stamp tool?
Use the Clone Stamp tool when you need to copy an exact detail from one part of an image to another. It's also helpful in removing unwanted objects or reproducing a damaged area of a photo.
How to Use the Clone Stamp Tool?
We'll now take a look at six different ways to use the Clone Stamp tool in Photoshop, including how to set up your project.
Step 1: Work on a New Layer
When retouching the photo, it is best to create changes within a designated layer instead of the original photo. Doing this will allow you to make changes and experiment with them without permanently altering the original photo.
Step 2: Set the Brush Hardness
To keep the cloned area looking natural, set the brush hardness to 0% to ensure the edges blend in with the surroundings and don't stand out too harshly. You can adjust this setting in the options bar of the Clone Tool.
Step 3: Quickly Adjust the Brush Size
It's common to need to adjust the brush size while using the Clone Tool. You can quickly adjust the size by pressing Ctrl (macOS equivalent is Command) and then clicking and dragging the mouse up and down for resizing the brush. It's essential to have the appropriate brush size for seamless blending when working with different image sizes.
Step 4: Beware of Unwanted Patterns

Be mindful of unwanted patterns that may arise from the repetition of parts of images. These patterns can be distracting to viewers and take away from an image's impact and quality. To prevent these from appearing, it's best to use randomized patterns and alternate the sampling points frequently.
Step 5: Clean Up with Spot Healing Brush
Sometimes, even with careful use of the Clone Stamp Tool, there may be artifacts in your photo that need to be cleaned up. That's when the Spot Healing brush comes into effect. It's an excellent tool for retouching an image and getting rid of unwanted effects and blemishes.
Step 6: Follow the Lines
Working with precise details requires a steady hand and consistency. The best way to do so is to follow the edges or lines of what you're copying. This process helps avoid repeating the same section repeatedly, creating unwanted patterns, and making your edits appear unnatural.
If you're using different layers, consider selecting "All Layers" under Sample in the Clone Stamp Tool option to copy content from all layers.
Questions you might be asking
Why can't I use clone stamp in Photoshop?
There may be multiple reasons why you can't use clone stamp in Photoshop. It could be that the layer you are working on is locked or you have chosen an inappropriate layer. Sometimes, the clone stamp tool does not work on empty layers or transparent backgrounds. Make sure to select an appropriate layer and mark it as unlocked.
How to do a clone stamp?
Doing a clone stamp in Photoshop is quite simple. You need to select the Clone Stamp tool from the toolbar on the left side of the screen. Find the area in your image that you want to clone, hold down the Alt key, and click the area. Then, move your cursor to the area you want to fix and start brushing over that area.
How do I use clone stamp in Photoshop 2023?
Using clone stamp in Photoshop 2023 is the same as other versions. You just need to select the Clone Stamp tool and start cloning the area you want.
How do you use the clone stamp pattern tool?
The clone stamp pattern tool allows you to select a predefined pattern or create your own pattern to clone. To use the clone stamp pattern tool, select the Pattern Stamp tool from the toolbar, choose the pattern you want to clone, select the source area and brush over the area you want to fix.