
As a 3D artist, I know Blender weight painting can be intimidating. Creating a pattern of vertex color intensity controls the rig's deformation. Relax! Here's a step-by-step guide to weight painting in Blender. You'll master this process with patience and practice.

What is weight paint in Blender?
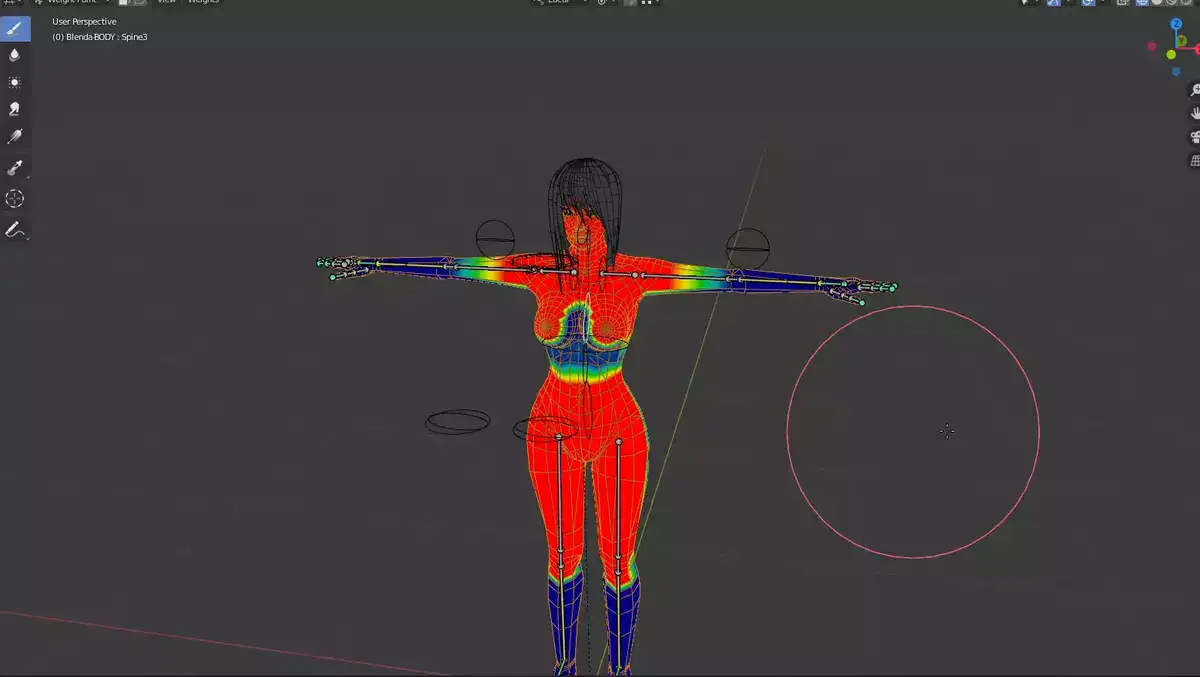
Weight paint in Blender is one of the most crucial tools I use as a 3D artist. You can give objects different weights using the incredibly powerful and adaptable weight paint tool, which in turn affects the object's physics simulation and other modifiers.
I can use weight paint to give any 3D model or character rig's vertices a specific weight. This can be used to manage hair particle modifiers, physics simulations, and how particles spread across emitters like smoke or water droplets. In addition, by defining how much each vertex should move when deformed under specific circumstances, it can be used to add intricate details and animations to a scene, such as adding wrinkles to fabric or deforming skin.
Also read: Select all in Blender
Gaining some practical experience is the best way to comprehend what weight paint does. I suggest looking up some in-depth Blender tutorials online that provide step-by-step guidance for setting up your own projects involving weight painting if you want to start learning more about this topic. You'll quickly realize why Blender's weight painting feature is so essential for bringing gorgeous 3D models and animations to life once you become familiar with its fundamentals.
How do you put weight in paint mode?
You can easily enter the paint mode using CTRL + TAB shortcuts.
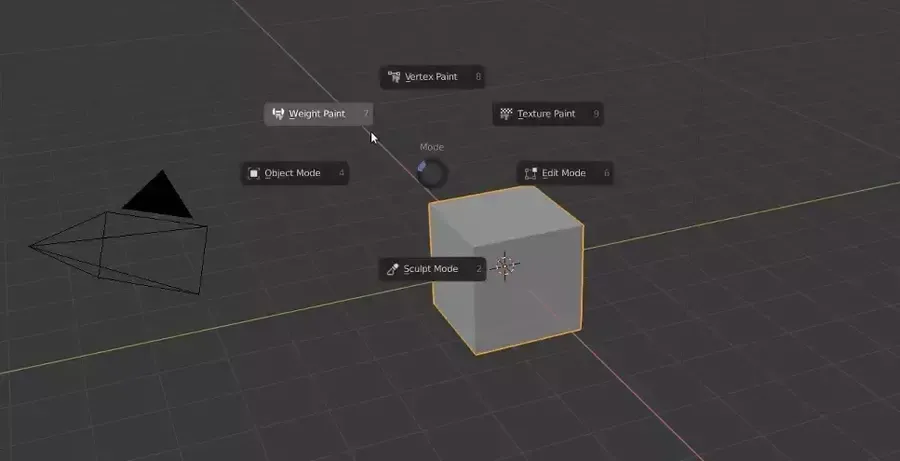
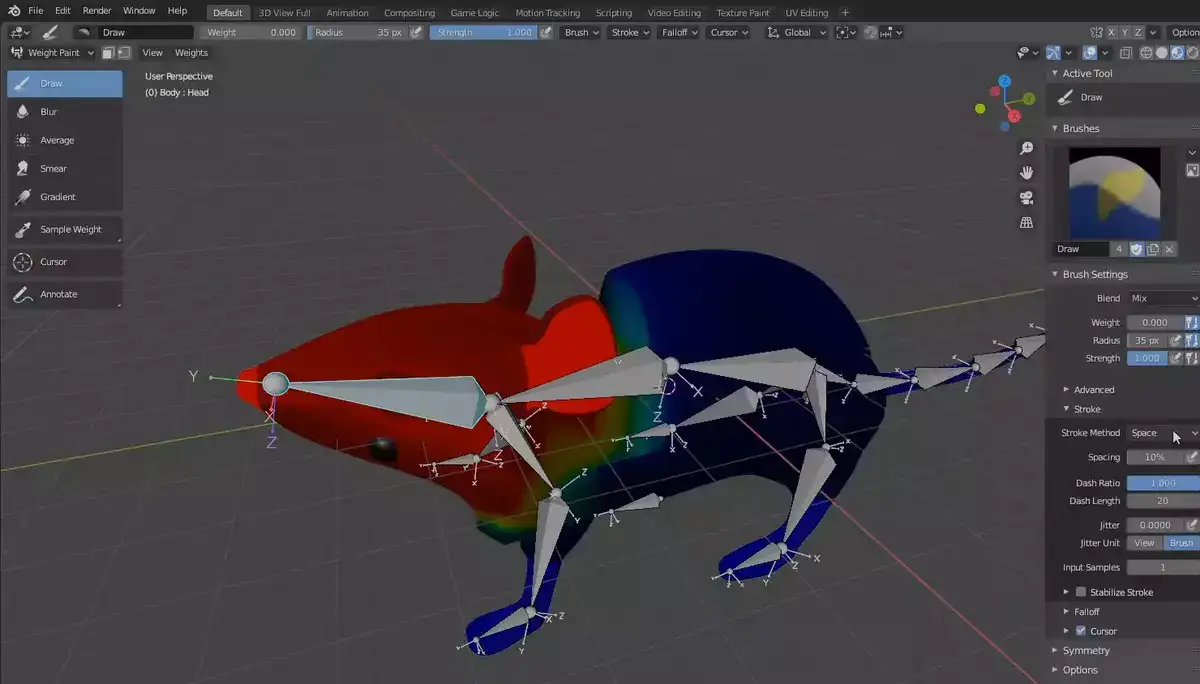
You could alternatively navigate to Weight Paint mode in 3D View's Mode selector if the shortcut isn't working for you. Once selected, your options appear on a Tool Shelf to the right of my screen, including a Brush tool, Smooth tool, Weight Gradient tool, and Weight Sample tool, allowing you to quickly adjust weights and features.
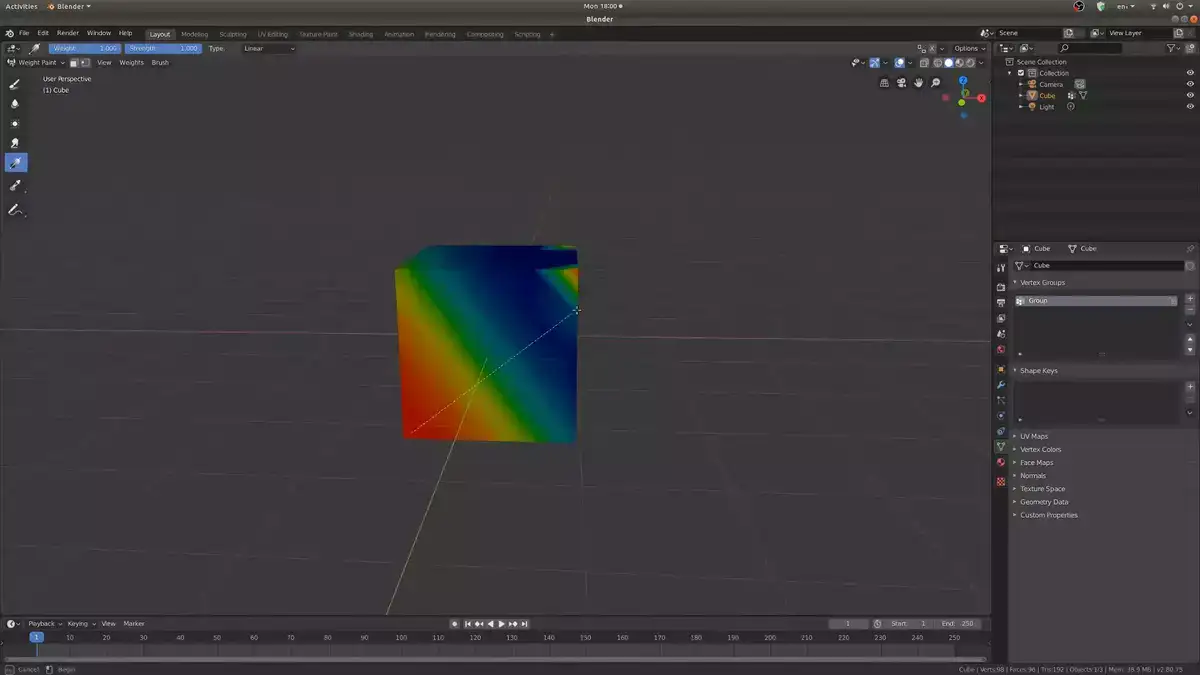
In Weight Paint mode, I can use rainbow color spectrum to indicate weights. To apply a weight one-third of its maximum value, I would select an orange-ish red color from Blender's Color Ramp menu. This visual cue helps me track where I've applied different weight levels across my model or scene, which is useful when creating complex animations or simulations.
Using these tools and settings gives me complete control over how each vertex affects its environment, allowing me to create compelling designs faster than ever.
Related: Why is Blender crashing during render?
How to Erase Weight Paint in Blender?
First open the 3D viewport and select the mesh to edit. Press CTRL + TAB to enter Edit mode after selecting your mesh. Then choose Weight Paint from the Mode menu.
Next, deselect any selected vertices in the vertex group with weight paint. Set all deselected vertices' weights to 0 in the Properties panel > Data section > Vertex Weights tab > Group by entering "0" without quotes in the Weight column for each weighted vertex group. All those weights are now zero, so they've been erased.
After erasing weight paint from your model, use the Brush tool or Smoothing brush tool from the Tools palette to smooth out edges or gradually apply new weights. Using proportional editing mode (Alt+O) smooths out edges with abrupt weight changes.
Weight Paint Blender Not Working
There are quite a few reasons weight paint may not be working for you in Blender.
First, you need to make sure you go to the edit mode and select all vertices before applying weight paint. Another reason could be that you're using older version of the software. For example, it had known issues up to version 2.81a. Simply make sure you are using the latest bug-free version!