In 3D computer graphics, materials and textures provide models real-world visual qualities. Blender lets you give materials to objects, faces, and vertex groups. This page explains how to do all these things.

Here are 3 key takeaways in case you don't have time to read the entire article:
- Blender materials and textures can be used to create lifelike visuals with realistic rendering effects by adjusting hue, transparency, and metallicness.
- Linking objects or grouping them together can quickly assign shared materials across multiple items.
- Make sure to choose the right material for your project before assigning it in Blender, as some may require additional UV mapping steps beforehand.
What is material in Blender?
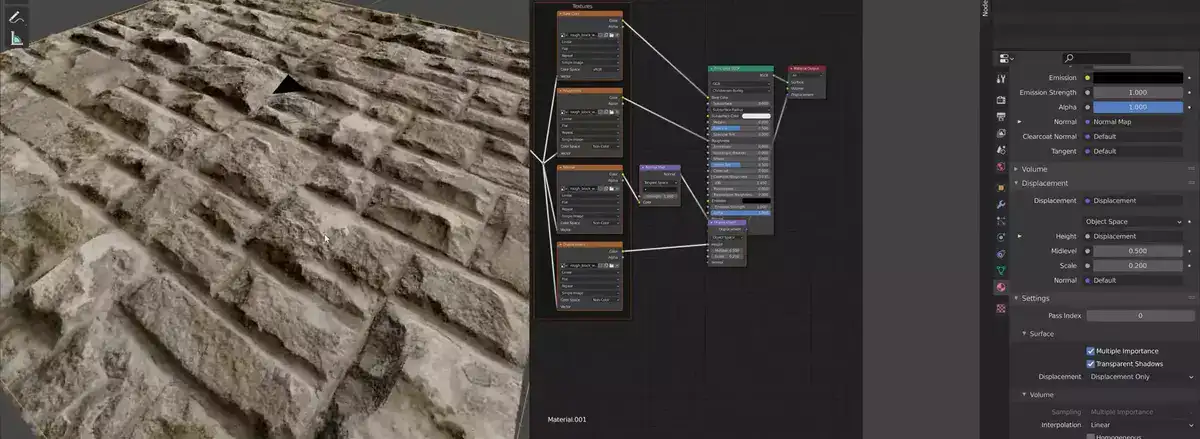
Blender materials represent surfaces and objects. It provides objects and surfaces their texture, color, transparency, and reflection. Textures, colors, and maps are used to generate materials that control an object's 3D surface. Ambient occlusion, roughness, and displacement maps offer surfaces realistic rendering effects.
Blender's materials help create lifelike scenes and personalities. They define how light interacts with an object's surface, giving it lifelike qualities like reflection off transparent materials like glass or metal, absorption of light into darker materials like wood or cloth, sheen on metallic objects, specular highlights on shiny surfaces, color variation through bumpiness, and many more physical attributes seen in real-world examples.
By combining textures, colors, and maps, you may replicate stone, plastic, textiles, and metals. Blender includes Iray (NVIDIA) and OctaneRender (OTOY) for photorealistic rendering.
Understanding material basics will help you create outstanding blender images. Experiment with LUTs, Normal Maps, and Bump Maps to generate different effects. With practice, you can create amazing images fast and simply, captivating your audience.
How do you assign materials and show textures in Blender?
Blender's materials and textures might be difficult for 3D art beginners. Understanding Blender's material system is important to good results.
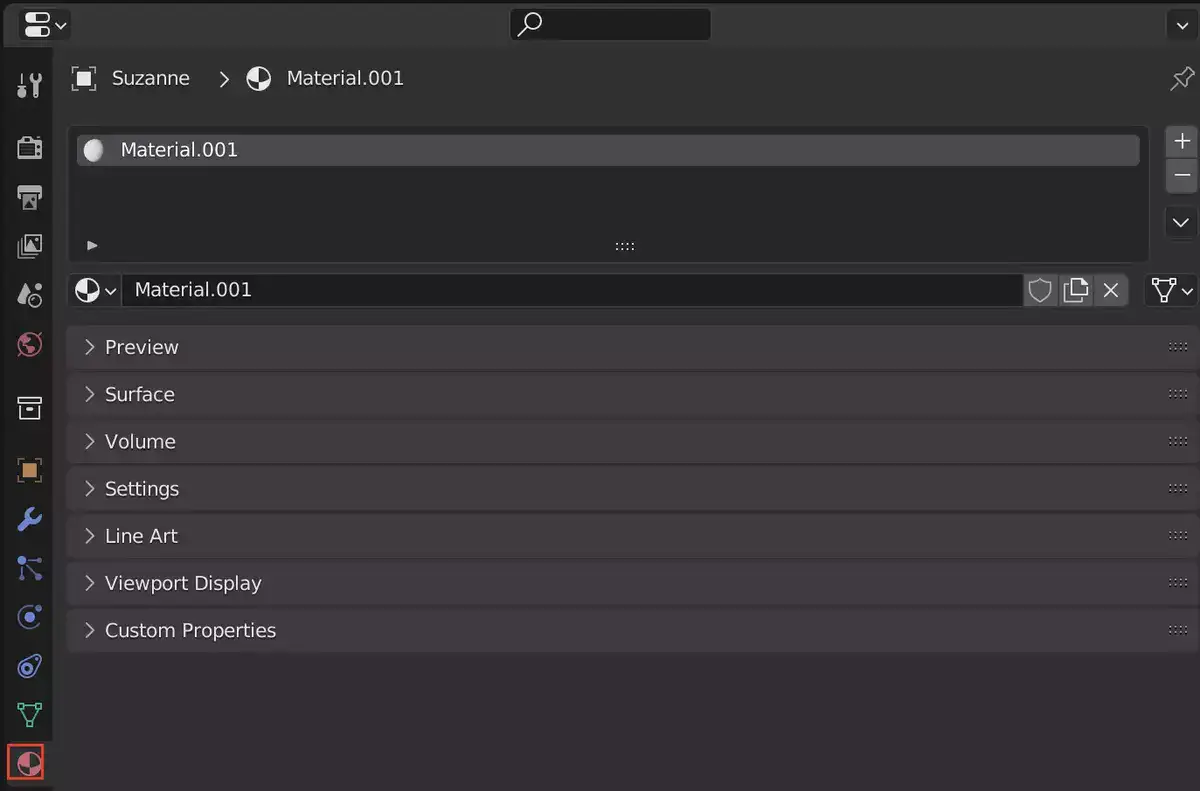
First, choose a surface shader from the Material panel's "Shader" drop-down option. This affects how light interacts with your object's surfaces, including reflections and refractions. From there, you may adjust hue, transparency, and metallicness to change how your items look in different lighting.
After choosing a material, add textures. Blender's image-based and procedural texture nodes can be combined to create rich detail to models. To assign picture maps as textures, drag them into the node editor and alter their properties. To adjust procedural textures like clouds and noise patterns, click on them in the list.
Remember that lighting affects texturing, therefore adjust global illumination settings (such shadows) and individual lamp settings (like intensity) before generating final images. Anyone can grasp assigning materials and textures in Blender with experience and patience, so don't be scared to experiment.
How do you assign the same material to multiple objects in Blender?

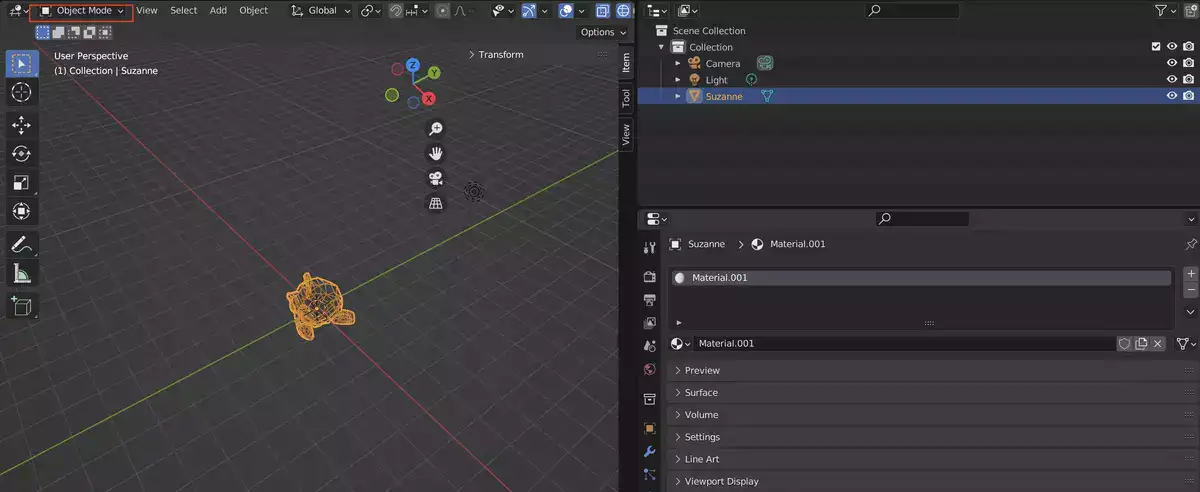
Blender's material assignment is easy and efficient. First, prepare your materials. To do so, enter the Material tab and create a new material. Hold Shift when clicking on each object to assign the same material. Go into Object mode by hitting Tab, then press Ctrl + L (or right-click > Make Links) to link the objects. This applies your chosen material to all selected objects.
Blender's Group functionality may instantly assign shared materials to several objects. First, group items that need the same substance. Then, pick "Make Groups from Selection" from any object's menu bar. Finally, open Material Properties again and drag & drop your selected materials onto any group object - it will immediately apply to all group members.
Either way should make assigning materials faster than manually setting each one, especially in large scenes or sophisticated models where materials must be changed often. You can quickly transfer materials across various things, whether they're marble or neon.
Material assigning not working
First, choose the suitable content for the assignment. Depending on your goals, some alternatives may be better than others. Before choosing a material, consider its rigidity, tolerance, and temperature resistance.
Once you've chosen the ideal material for your project, assign it properly in your software (e.g., Blender). If you have numerous objects with different colors/materials, each object needs its own shader to give it unique features. Certain applications may require more adjusting (e.g., UV mapping), so make sure this is done before continuing further with the project.
Final Words
In this article, we've gone over how to assign materials and textures to objects in Blender. We've also shown how to assign the same material to multiple objects, and how to use vertex groups to assign materials to specific parts of an object.