In today’s digital age, we’re all constantly taking photos on our mobile devices and cameras. However, sometimes we capture an awe-inspiring landscape, memorable event, or special moment that can’t be fully captured in a single photograph. That’s where creating a panorama comes in handy.
In this how-to guide, we’ll be exploring the steps needed to create a panorama photo in Adobe Photoshop - one of the most widely used photo editing software in the world.

Step 1 – Shoot for Photoshop Panorama
To begin with, it’s crucial to capture your images with the intention of creating a panorama in mind. Some tips to keep in mind while shooting are:
- Use a tripod: A stable tripod ensures all images are shot from the same height and angle, resulting in a more seamless panorama.
- Overlap images: Take multiple images, overlapping each one slightly with the previous. An overlap of about 30% is ideal for good results.
- Keep the camera steady: When shooting handheld, ensure that you hold your camera steadily while capturing the different images.
Step 2 – Open Images in Photoshop

Once you have captured the images, it’s time to open them in Adobe Photoshop. To do this, follow these steps:
- Open Adobe Photoshop on your computer
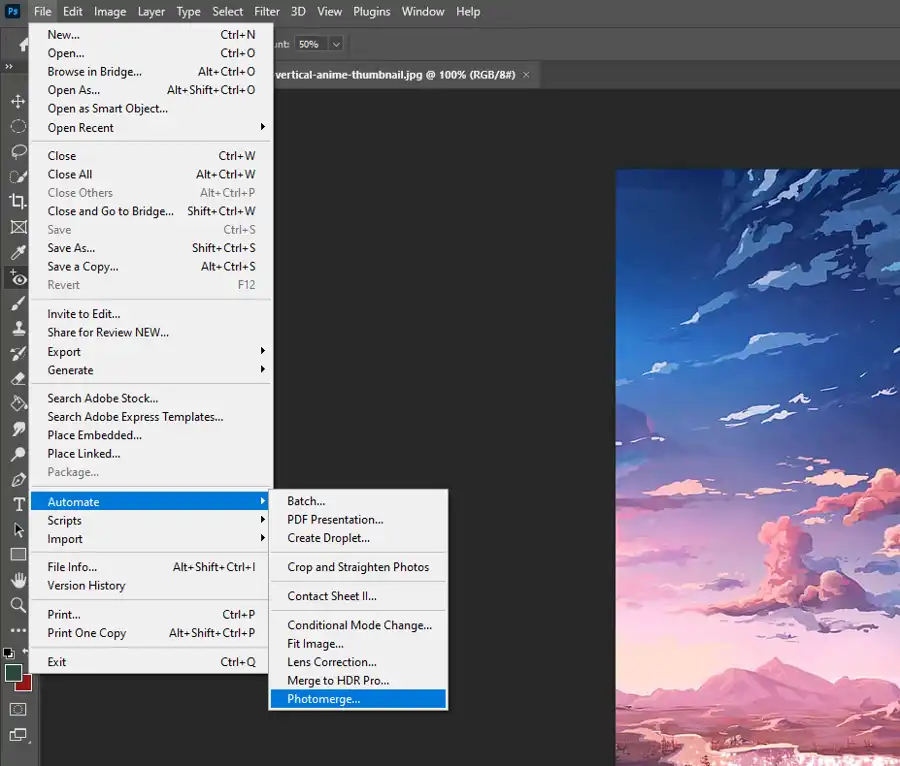
- Click on File > Automate > Photomerge
- The Photomerge window will appear
Step 3 – Select Panorama Options
After opening the Photomerge window in Photoshop, it’s time to select the panorama options:
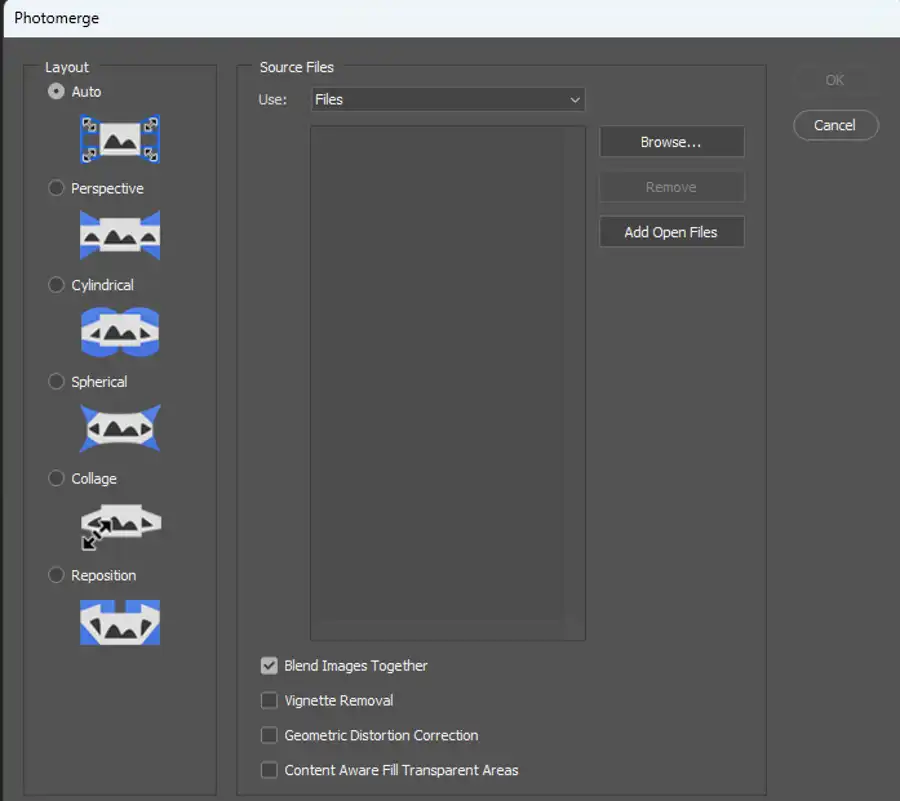
- Under the Photomerge window, select “Files” and then click on “Browse” to select the images you want to stitch together.
- After selecting the images, select the “Panorama” option under “Layout”.
- Ensure that the “Blend Images Together” box is checked. This option will merge the individual images together, producing a seamless panorama.
Depending on the nature & direction of your photographs, you could select auto, perspective, cylindrical, spherical, collage, reposition layout options. Auto works good most of the time.
Some other options available are Blend Images Together, Vignette Removal, Geometric Distortion Correction, Content Aware Fill Transparent Areas.
Feel free to explore them until you get the best result.
Step 4 – Wait for Photoshop to Create Panorama
Once you have selected the panorama options in the Photomerge window, it’s time to wait for Adobe Photoshop to create the panorama. This process may take a few minutes, depending on the number of images you have selected.
Step 5 – Save and Edit Your Panoramic Pictures
After Photoshop has created the panorama, it’s time to save and edit the image.
- Select “File” > “Save As”.
- Save the image with your desired name and format.
- After saving the image, you can edit it further by using tools such as the Photoshop crop tool, exposure, and color levels, or even apply filters to modify the look and feel of the image.
In just a few simple steps, you can create incredible panoramic photos that capture the breathtaking moments of your lifetime. With Adobe Photoshop's easy-to-use Photomerge tool, capturing incredible memories is now easier than ever.
Questions you might be asking
How do I make a photo panorama in Photoshop?
Making a photo panorama in Photoshop is fairly easy. Here are the steps:
- Open Photoshop and select “File > Automate > Photomerge”.
- In the Photomerge dialogue box, click “Browse” and select all the photos you want to use.
- Select “Layout” and choose the “Auto” option.
- Click “OK” and wait for Photoshop to do its work. This may take a few minutes, depending on the number of photos.
Once Photoshop has finished merging the photos, you can crop the image, adjust the colors as required, and save the file in your desired format.
How do I make multiple pictures into a panorama in Photoshop?
To make multiple pictures into a panorama in Photoshop, follow these steps:
- Open Photoshop and select “File > Automate > Photomerge”.
- In the Photomerge dialogue box, click “Browse” and select all the photos you want to use.
- Select “Layout” and choose the “Auto” option.
- Click “OK” and wait for Photoshop to do its work. This may take a few minutes, depending on the number of photos.
- Once Photoshop has merged the photos, you can crop the image and adjust the colors as required.
How do I manually stitch a panorama in Photoshop?
To manually stitch a panorama in Photoshop, follow these steps:
- Open all the photos you want to use in Photoshop.
- Create a new document in Photoshop with the dimensions you want for your panorama.
- With one of the photos selected, use the Marquee Tool (M) to select the portion of the photo that will form the first part of the panorama.
- Copy and paste this selection into the new document.
- Repeat this process for each photo, placing each new selection side-by-side with the previous one.
- Once you have all the photos in the panorama, use the Move Tool (V) to adjust their placement as needed.
- Finally, crop the image to your desired size and adjust the colors as required.
How can I create a panorama?
There are several ways to create a panorama, but the two most common methods are:
- Using a specialized camera or lens that can capture panoramic images.
- Using photo stitching software like Adobe Photoshop, Hugin, or Microsoft Image Composite Editor.
The first method provides better results, but requires specialized equipment. The second method is more accessible and can work with any set of photos that have overlapping areas. To create a panorama, you need to take multiple photos of the same scene from different angles and then stitch them together with the software. Regardless of the method you choose, the result is a single image that captures a wider field of view than any single photo could.