Blender beginners may find skybox setup challenging. Complex 3D modeling techniques like shading, lighting, and composition are required to get the job done right. However, anyone can learn how to do it with patience and by following our instructions.

In today's tutorial, we'll design a skybox in Blender step by step. We'll start by adding lights and camera angles, then create a sky dome using the cutter tool and boolean operations. Finally, we'll apply textures and generate the finished image.
Follow along as I show you how to create stunning graphics with Blender's sophisticated skybox tools.
Also read: How to Make a Wood Floor in Blender?
What is skybox in Blender?
A skybox is a crucial component of any 3D environment. It gives the appearance of a huge, open space that extends outside the confines of the game or application, which aids in the creation of a realistic setting in 3D situations. A skybox is a collection of components that are assembled in Blender to produce a complex, realistic-looking sky with no discernible seams.
Skyboxes have a variety of uses, including computer-generated movies, architectural visualizations, video games, and more. They are very adaptable and simple to use because to Blender's robust tools. Understanding how it functions is crucial if you want to make your own projects appear credible and expert.
How do you make a sky box in Blender?
There a few ways to accomplish this. But here's the process I use to create skyboxes in my renders:
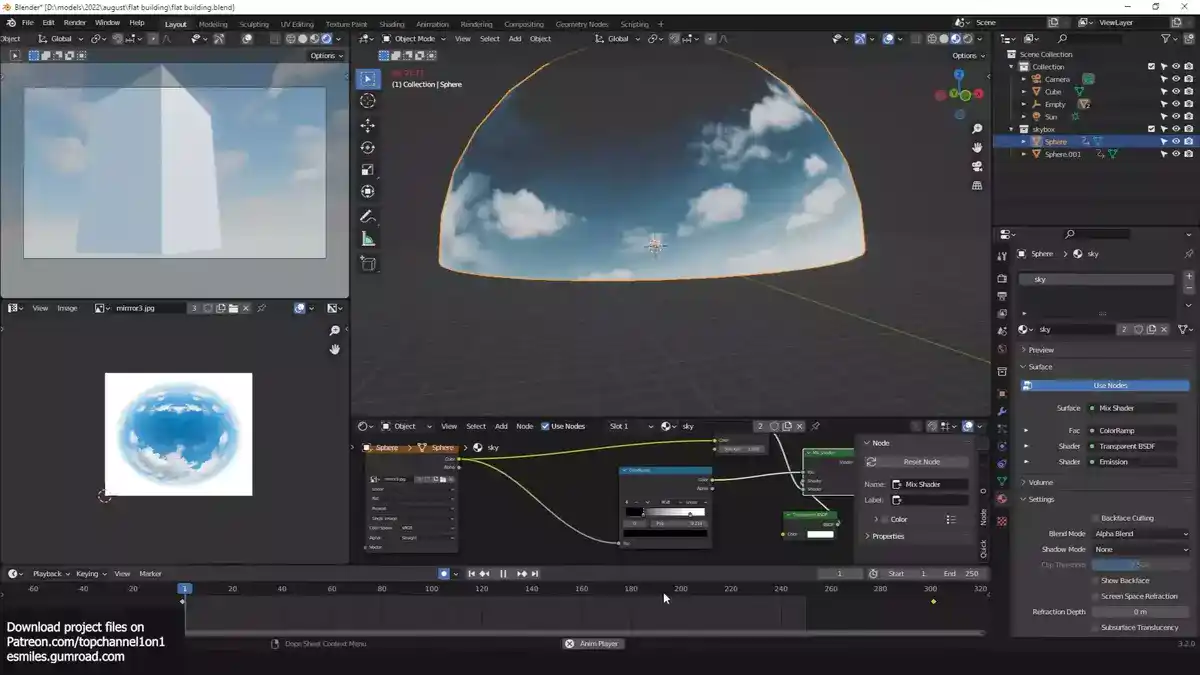
- The Shading Workspace tab on the Blender interface header should be selected initially. With the Node Editor now open, we can start building our skybox.
- Next, we require a surface to which we can apply our sky texture. To achieve this, select "Use Nodes" under the World tab, then "Add > Texture > Environment Texture" and drag the file into your node editor window. If necessary, use Ctrl+A to reassign values to ensure that everything is connected properly.
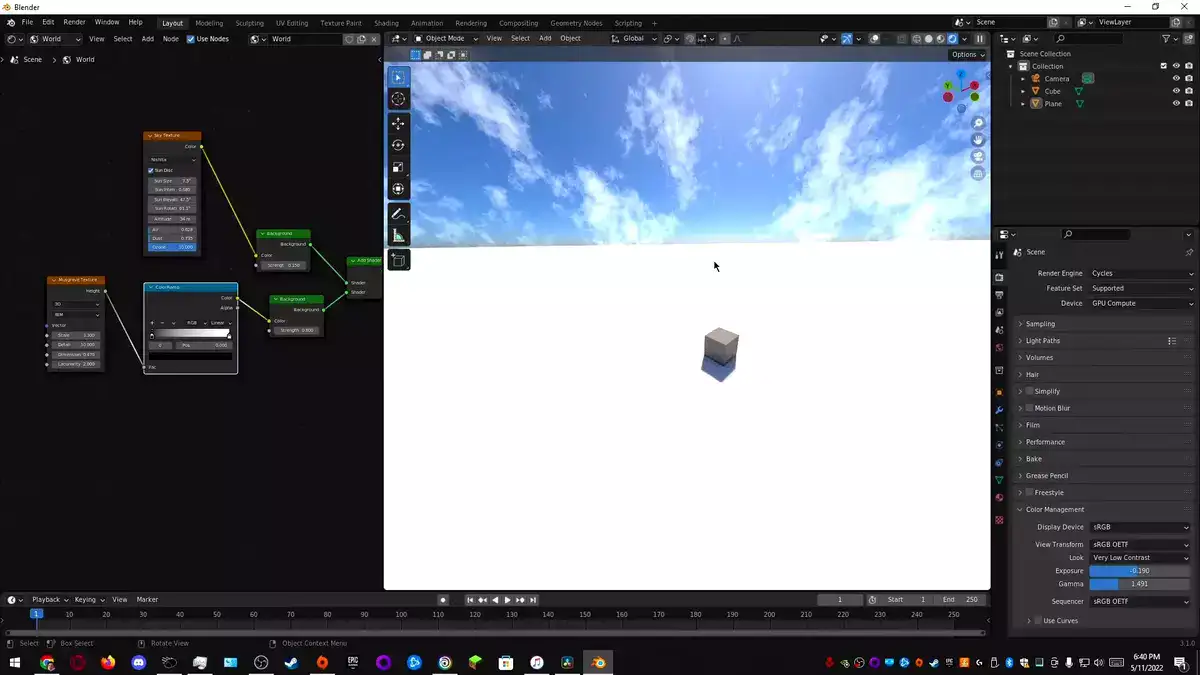
- The type of sky texture we want for our scene can now be decided. There are numerous types, including Nishita (for the day), Hosek/Wilkie (for the night), Preetham (for scattering), etc. Additionally, we can combine these various kinds for a more distinctive appearance! To ensure that everything mixes seamlessly while rendering in Eevee or Render Mode with Material Preview Mode chosen, we must first choose the desired sky texture type and then build up a background node with a sky type at its output.
- All that's left to do after finishing all of these processes is make a few minor tweaks, like picking colors and intensities, until you're satisfied with the outcome! Just keep in mind that too much adjusting can damage the appearance and feel of your scene; sometimes, less really is more. Don't get carried away! With these pointers in mind, making an aesthetically beautiful skybox in Blender that brings your 3D scenes to life shouldn't be too difficult now.
Related: How to Change Material in Blender?
Conclusion
Anyone can create gorgeous 3D settings with realistic skies for their projects by making use of the advanced skybox tools that are available in Blender and following these straightforward instructions.