Adobe Photoshop is a powerful tool for image editing and manipulation. One of its features that is worth exploring is the Dodge tool. The Dodge tool works by lightening up specific areas of the image, without affecting the hue or saturation. This tool is especially handy when working with photos that need some detailing or brighter shading in certain areas. This article gives a detailed understanding of what Dodge tool does, how to use it, and what the options will look like.

What is the Dodge Tool in Photoshop?
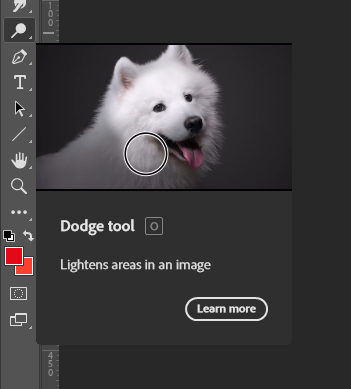
The Dodge tool in Adobe Photoshop is used to lighten specific areas of an image, while preserving the hue and saturation of the image. It is named after the traditional darkroom technique of "dodging," which is used to lighten an area in the image during the printing process. In digital photography, the Dodge tool works similarly to "dodging" by allowing the user to lighten a specific part of an image while maintaining the original color.
How to Use the Dodge tool in Photoshop?
Using the Dodge tool in Photoshop is a simple process, but it requires a little bit of practice to get the desired effect. Before starting, it is advisable to work on a duplicate layer of your image. This is because the effects of the Dodge tool are permanent and cannot be undone once they are applied.
Once your duplicate layer is prepared, select the Dodge tool from the toolbar. The icon of the tool is a magnifying glass. Before using the tool, customize the tool settings using the Options bar, which is located at the top of the application window.
The Options bar provides several options for customizing the Dodge tool to suit your needs. To start with, adjust the brush size according to the size of the area that you want to lighten. You can do this by clicking on the brush size drop-down menu and selecting the size that best fits your image. You can also change the hardness or softness of the brush from this menu.
Another important option is the range, which allows you to choose which areas of the image you want to lighten. By default, the tool lightens the mid-tones of the image. However, if you want to lighten only the highlights or shadows, you can change the range option to either highlights or shadows. This will cause the tool to only affect the highlighted or shadowed areas of the image.

Another important option is the exposure, which controls the strength of the tool's effect. The exposure is measured in percentages, and the higher the percentage, the more lightening effect is applied.
Now that you have customized the tool settings, you can drag over the area of the image that you want to lighten. You can drag the Dodge tool over the image with a mouse to cover the area you wish to affect or use the marquee tool to select the region.
Options of Dodge Tool
The Dodge tool comes with several options that can be used to modify the tool's effect. They include brush size, brush settings, range, exposure, airbrush, and protect tone.
The brush size allows you to adjust the size of the brush that you are using, which gives you more precise control over the part of the image that you are lightening. Brush settings allow you to add additional settings to the brush, whereas the range option lets you select the middle range of grays, dark areas, or light areas of the image. Exposure controls the strength of the tool's effect on the image, while the airbrush option is used to apply an airbrush-like effect to the image. Finally, the protect tone option preserves the tonal quality of the image while lightening and prevents colors from changing to different hues.
Tips, tricks, and guidelines:
Here are some tips and guidelines that can help you use the Dodge tool more effectively:
- Experiment with different exposure settings to determine the effect that works best for your image.
- Be careful not to overuse the tool, as it can make the image appear washed out or grayed out.
- Use the Dodge tool in conjunction with other tools like the Burn tool to create more realistic shading effects in images.
- Remember that the Dodge tool only works on images that have enough pixel information to pull from.
Conclusion
The Dodge tool is an essential tool in Adobe Photoshop that can help you to enhance your images by lightening up specific areas. Using the Dodge tool may seem intimidating at first, but with practice, you can achieve the desired effect with ease and precision. Combine it with other editing tools and techniques to add more depth and shading to your photos. Whether you are a professional photographer or a beginner, the Dodge tool is an essential tool to have in your toolkit for image editing and manipulation.
Questions you might be asking
Where is the dodge tool in Photoshop?
The dodge tool is located in the toolbar panel on the left-hand side of the Photoshop interface. It is represented by an icon that looks like a magnifying glass with a small hand inside it. To access the dodge tool, simply click on its icon or press the letter "O" on your keyboard.
What is meant by Dodge tool?
The dodge tool is a photo editing tool that lightens specific areas of an image. It works like a brush that adds or subtracts brightness to selective parts of a photo. The dodge tool is typically used to brighten up highlights in an image such as a person's face or the sky in a landscape photo.
What is Dodge brush tool?
The dodge brush tool is simply the dodge tool with a brush option. This allows you to choose the size and hardness of the brush tip, making it easier to selectively lighten areas in a photo. The dodge brush tool is commonly used for localized and more detailed adjustments.
Why is it called dodge in Photoshop?
The dodge tool is called "dodge" because it was named after the photographic technique of dodging and burning. In traditional darkroom photography, photographers would use their hands or small tools to selectively lighten or darken specific areas of the image by blocking or allowing light to pass through the enlarger. The dodge tool in Photoshop simulates this technique digitally. When you use the dodge tool, you're "dodging" or blocking light from specific areas to achieve a desired effect.