Are you looking to take your photo editing skills to the next level? Do you want to learn how to erase unwanted objects or people from your photos? If so, Adobe Photoshop's Content-Aware Fill tool may be just what you need. Content-Aware Fill is a powerful tool that can save you time and effort when photo editing. In this article, we'll explore how to use Content-Aware Fill in Photoshop and provide tips to make your editing experience smoother.

Introduction to Content Aware Fill
Photoshop is a photo editing software that is used by professionals and amateurs alike. It is a versatile tool that allows users to manipulate images and create artwork. Content-Aware Fill is a feature in Photoshop that can automatically fill in areas of an image that have been erased or removed. It is often used to remove unwanted objects or blemishes from a photo.
Get to know the workspace
Before you start using Content-Aware Fill, you must get familiar with the Photoshop workspace. The workspace includes a menu bar, options bar, tool panels, and the canvas. Familiarizing yourself with the workspace will help you work more efficiently and effectively.
How to use Content Aware Fill in Photoshop?
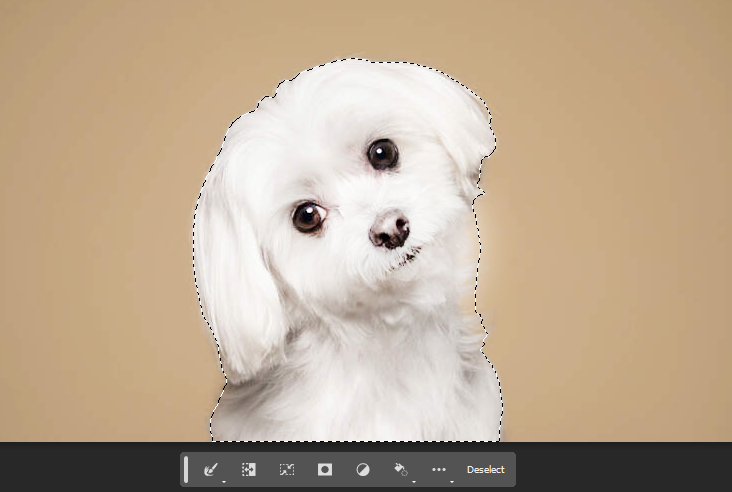
Step 1: Selecting the Area
Start by opening your image in Photoshop and selecting the area you want to remove or replace. You can use any selection tool such as the Lasso, Marquee, or Quick Selection tool depending on the complexity of the area.
Step 2: Accessing Content-Aware Fill
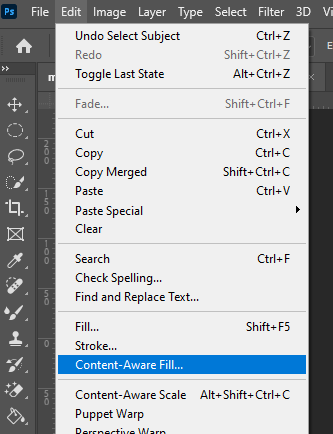
Once you have made your selection, go to the top menu and click on "Edit" > "Content-Aware Fill." This will open the Content-Aware Fill dialog box, where you can fine-tune the settings to achieve the desired result.
Step 3: Configuring Content-Aware Fill Options
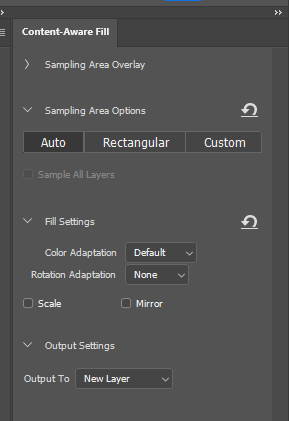
In the Content-Aware Fill dialog box, you'll find several options to customize the fill process. Here's an overview of the key settings:
- Sampling Area: This option allows you to specify the area Photoshop uses to analyze and generate the fill. By default, it selects an area around the selected region. You can adjust the sampling area by dragging the handles or using the brush tools.
- Color Adaptation: Use this setting to control how well the generated content matches the surrounding colors. The "None" option retains the original color, while higher settings adapt more closely to the surroundings.
- Scale: The Scale slider determines the size of the generated content. Adjust it to match the scale of the surrounding elements for a seamless result.
- Rotation: The Rotation slider enables you to adjust the angle of the generated content, which is useful for aligning patterns or correcting perspective.
- Mirror: Enabling this option creates a mirror reflection of the surrounding area within the fill. It can be useful when working with symmetrical objects or backgrounds.
Step 4: Refining the Fill
After adjusting the settings, Photoshop generates a preview of the fill. At this stage, you can refine the results by using various tools:
- Brush Tool: Use the Brush tool to paint over areas that need improvement or removal. You can choose between "Sample" and "Erase" modes to refine the fill or remove unwanted details respectively.
- Output Settings: The Output Settings section allows you to choose how the filled pixels will be displayed. You can select "New Layer" to preserve the original image on a separate layer or choose "Selection" to replace the pixels directly on the current layer.
- Filling Multiple Areas: To fill multiple areas within the same image, click the "+" icon in the Content-Aware Fill dialog box. This allows you to repeat the process and refine each fill independently.
Step 5: Applying the Fill
Once you're satisfied with the results, click "OK" in the Content-Aware Fill dialog box. Photoshop will generate the fill and apply it to the selected area. You can further fine-tune the fill by using additional editing techniques like blending modes, layer masks, or adjustment layers.
Conclusion
Content-Aware Fill in Photoshop provides a powerful and efficient way to remove or replace elements within your images. By following this step-by-step guide, you'll be able to master the process of using Content-Aware Fill and achieve professional-level results. Experiment with different settings and tools, and don't be afraid to iterate and refine the fill until you're satisfied with the outcome. With practice, you'll unlock the full potential of this remarkable feature and enhance your image editing capabilities.
Questions you might be asking
Why can't I do Content Aware Fill on Photoshop?
If you can't do Content Aware Fill on Photoshop, it could be because you are using an older version of Photoshop that doesn't have this feature. Content Aware Fill was first introduced in Photoshop CS5 and has been improving with each subsequent version of the software. Therefore, to use Content Aware Fill, you need to have Photoshop CS5 or a newer version installed on your computer.
How do I get the Content Aware box in Photoshop?
To get the Content Aware box in Photoshop, you need to first select the area that you want to remove or replace. Once you have made your selection, go to the Edit menu and select Fill. In the Fill dialog box, choose Content-Aware from the Use drop-down menu and click on OK. This will activate the Content Aware feature and allow Photoshop to automatically fill the selection with matching pixels from the surrounding area.
How do I fill content aware edges in Photoshop?
To fill content aware edges in Photoshop, you first need to make sure that your selection doesn't have any hard edges or abrupt transitions. This is because Content Aware Fill works best with gradual transitions and subtle gradients. Once you have made your selection, use the Magic Wand or Lasso tool to refine the edges and make them more natural. Then, follow the steps outlined in the previous answer to activate Content Aware Fill and let Photoshop do its magic. If you still encounter issues with hard edges or visual artifacts, you can try blending the filled area with the rest of the image using the Clone Stamp or Healing Brush tools.