If you are an amateur video editor, you have probably come across the term ‘keyframes’ and you might be wondering what they mean.
All video editing software and apps have keyframes, including Adobe Premiere Pro. It is an important tool used when editing videos and adding animations or transitions.

In simple terms, they are markers that allow the editing software to know where an animation begins and where it ends.
It helps the video editor not to manually edit every frame and with it, they can manipulate the animations as they please.
Now that you know what keyframes are, read on to learn how to add keyframe text and how to add keyframes to audio in Premiere Pro.
How Do You Keyframe Text in Premiere Pro?
To convey a message to your audience clearly, use text. They are also important in hooking the audience to a film and will have them glued to your masterpiece.
A keyframe will help you achieve such visually appealing text and this is how you do it.
Step 1: Import Your Video to Premiere Pro Timeline
Begin by opening Premiere Pro then import the video you want to animate to the timeline. Click the timeline display settings then choose show video keyframes.
Step 2: Start Adding the Keyframes
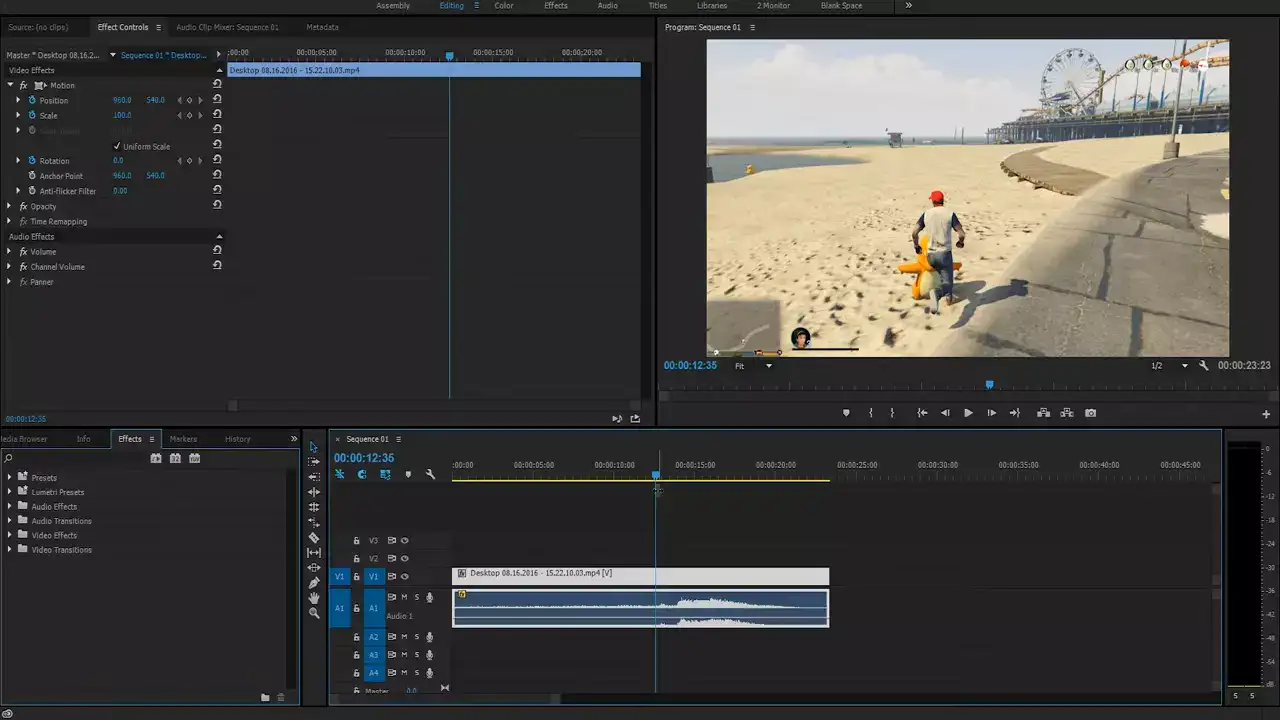
Go to the Effects Controls panel then click the Toggle Animation Panel which will then activate the keyframing process.
Choose the video which contains the effect you want to animate. To ensure that the keyframe is visible, enable both the video track and audio.
To expand the effect that you wish to add to the keyframes, click the triangle in the Effects Control Panel, and to activate the keyframes for an effect property, click the Toggle Animation icon.
However, you may skip this step if you are adding keyframes to a fixed effect.
Step 3: Adjust the Value of the Effect Property
To do this, click the Add/Remove Keyframe button from the Effect Control panel.
Alternatively, if you are using Windows you may Ctrl-click, and if you are a Mac user Command-click.
To access the effects property, adjust the controls in the Effects Control panel to automatically create the current keyframe text.
You can also navigate existing keyframes using the keyframe navigator arrow.
How To Add Keyframes to Audio in Premiere Pro

The process of adding keyframes to audio in Premiere Pro is similar to adding texts but with slight differences.
Step 1: Add the Audio Track on Adobe Premiere Pro
Launch your Premiere Pro then import an audio track to the timeline by selecting Project > Import. Alternatively, you can drag and drop the audio.
Step 2: Show Keyframes for the Track
Select the ribbon of your audio track from the timeline. Premiere Pro will then automatically provide different keyframes for the audio track.
Right-click on your working area then select “Show Audio Keyframes” from the context menu. Alternatively, you may also click “Show Keyframes” indicated by a circle/radio icon.
Step 3: Work on Audio Keyframes in Premiere Pro
At this point, you can view the track keyframes by right-clicking the keyframe button on the timeline to launch different options.
You will have various options either to mute or set up the audio track. The keyframes will be visible in a highlighted color.
Use the pen tool to CMD key if you are a Mac user to select the keyframes. You will then be able to choose the beginning and end of the keyframes and then apply the effects you desire.
Why Can’t I add a Keyframe in Premiere Pro?
Right-click the FX icon then choose the parameter you want to use for the keyframes if you can't add a keyframe in premiere pro.
What’s the Shortcut for Adding/Removing Keyframes?
If you are using a windows device, Ctrl-click, and if you are a Mac user, Command-click a keyframe using the pen tool or selection tool. Afterward, adjust the property value of the effect.
To remove keyframes, select one or more keyframes you wish to remove then select Edit > Clear or click delete.