Centering objects in Blender is a crucial step in the animation process because it enables precise alignment of two or more elements with respect to one another. Using the right centering techniques not only improves the movement between the various parts of your scene but also keeps your projects consistent.
I'll break down the entire procedure into manageable steps in this article so that anyone can easily understand it. No prior experience with 3D animation or Blender is necessary; all you need is a fundamental understanding of how computers operate and the desire to learn something new. Before introducing you to more complex ideas like rotations and transformations, we'll first go over the fundamentals. We'll end by offering some advice on resolving typical problems.

Also read: How to Use Scale in Blender?
How do I center an object to the origin in Blender?
Centering an object's origin in Blender can help with manipulation and alignment. First, choose your object. Left-clicking or selecting it from the scene's list works.
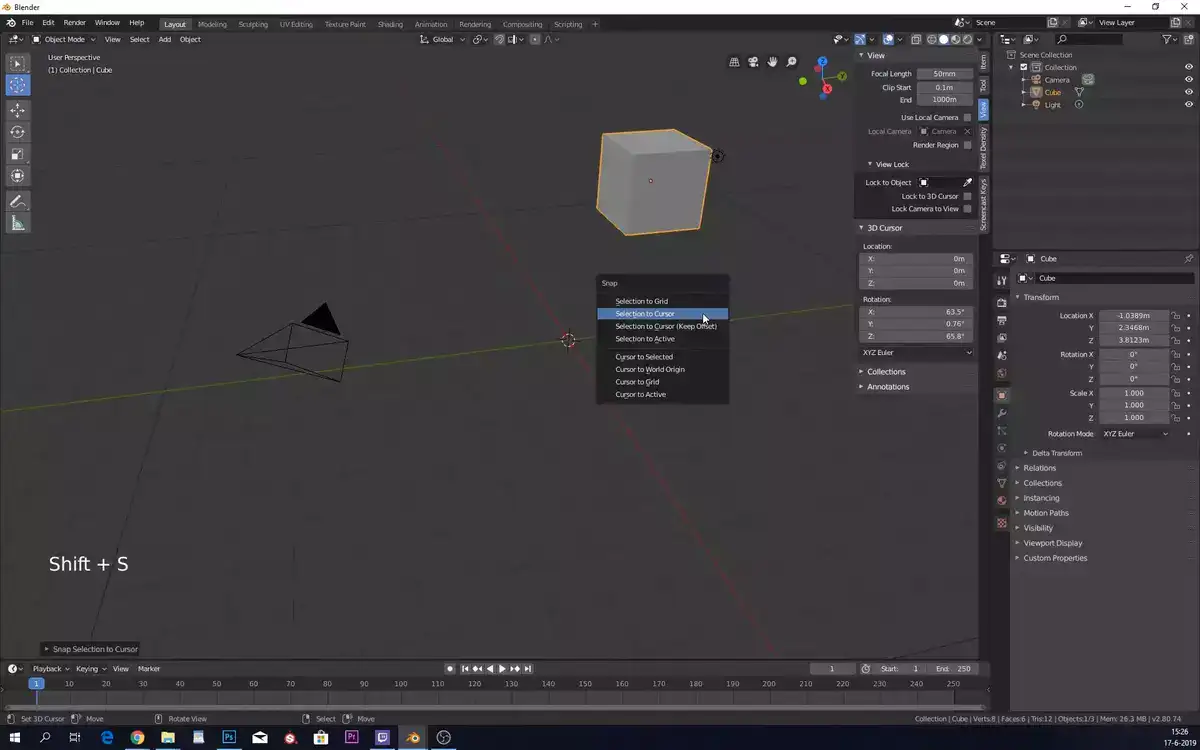
Right-clicking an object in the viewport brings up options. Set Origin opens a menu with Origin to Geometry and Origin to 3D Cursor. Choosing one of these options centers the origin point on the geometry or cursor.
Moving the cursor won't affect the origin point until you set it through this menu. Once that's done, you can freely manipulate your object without worrying about its origin being off-center.
Blender makes it easy to center an object's origin in a scene or for later manipulation. To quickly center an object, select it, right-click, and choose Origin To Geometry or Origin To 3D Cursor.
How do you align all objects in Blender?
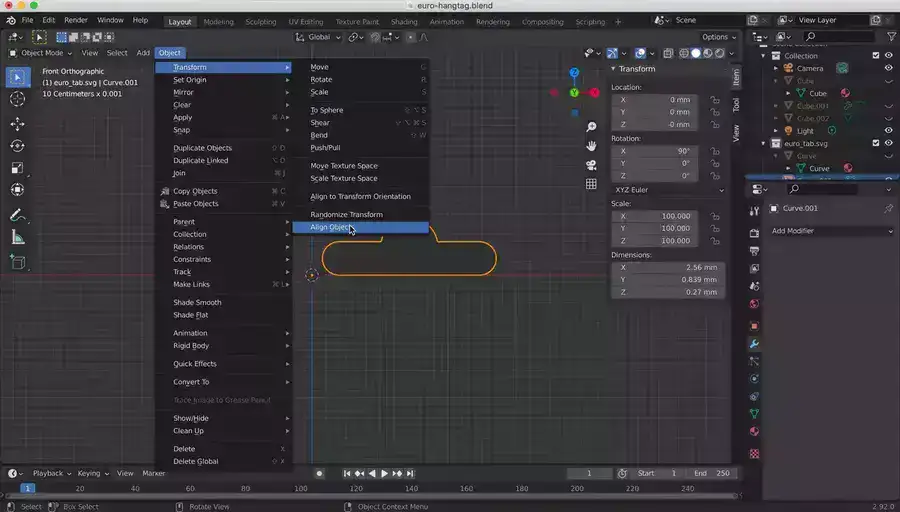
First, open your camera view in blender so everything is visible in 3D View. This lets you manipulate your scene easily and precisely. View > Toggle Orthographic enables orthographic view. This ensures perfect alignment without perspective distortion.
Once your view is correct, select all objects that need to be aligned by pressing Shift + A or selecting Object > Select All Objects from the menu bar. You can now manipulate all of your selected objects.
Related: How to Add Texture to An Object in Blender?
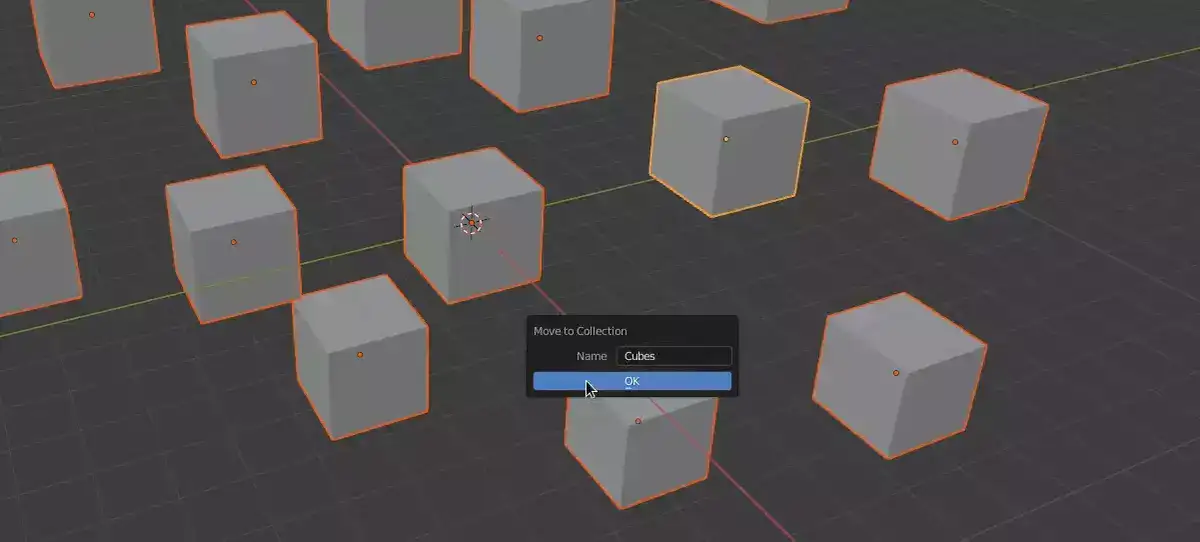
If you need all of the selected objects to move together as a single entity for easy alignment, press Ctrl+G or go to Object > Group Objects. This makes it easier when dealing with large groups of separate meshes that need perfect placement relative to one another. Once grouped, use G (Grab) mouse mode to move them.
Aligning multiple individual meshes within a scene can be done using snap tools like Vertex Snap, which allows precision placement along various axes such as width or height. Simply enable Vertex Snap via Tab (Edit Mode), then select two vertices on two comparable meshes/objects and press Ctrl + Tab > Vertex Snap to match those vertices' coordinates points. Edge Snap lets you move two meshes/objects edge-to-edge. Once both sets of vertices are snapped together, use translation manipulators (Shift+T) or grab mode (G) to fine-tune their positioning.