Have you ever experienced playback issues when applying multiple effects to your track in Adobe Audition? If you have, you may have received an error message, stating "The selected effect may not be suitable for real-time playback." This can be frustrating and can negatively impact your workflow. Luckily, there is a solution: the pre-render option.

What is the pre-render option?
The pre-render option is a feature in music production software that allows you to render a section of your track, or the entire track, in advance. During rendering, the software processes the audio effects and converts them into an audio file, which will require less processing power during playback. This can minimize the risk of crashes and errors, allowing you to work more efficiently.
Reasons to use pre-render option:
As previously mentioned, the primary advantage of using the pre-render option is that it reduces the processing power required during playback. This is especially useful when working with multiple tracks or complex mixes that feature multiple effects. By pre-rendering sections of your track, you'll be using your computer's CPU more efficiently, ensuring smoother playback. Additionally, pre-rendering minimizes the latency you may experience during playback.
How to pre-render in Audition
Step 1: Open Your Adobe Audition Project
To start, launch Adobe Audition and open the project you're working on. If you don't have a project opened already, create a new one or open a project file you've previously saved.
Step 2: Navigate to Multitrack View
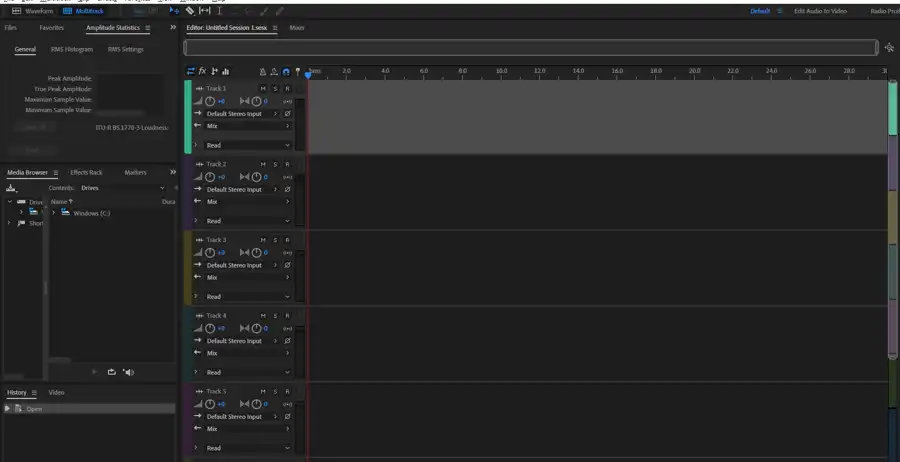
Pre-rendering is done in the Multitrack editor. Once your project is open, navigate to the Multitrack view by clicking on Window > Multitrack or use the shortcut Ctrl + M on Windows or Cmd + M on Mac.
Step 3: Open The Track Controls Panel
In the Multitrack editor, you should see a list of your tracks on the left. Here, you'll find various controls for each track, including volume, pan, effects, and more. This is called the Track Controls Panel.
Step 4: Enable Pre-rendering
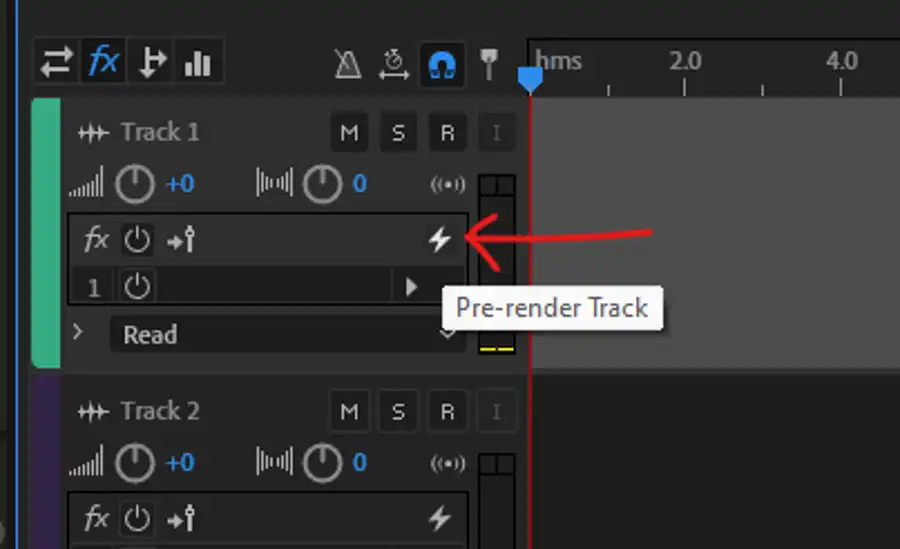
To enable pre-rendering for a track, locate the FX button in the Track Controls Panel. When you hover over it, you'll see a tooltip that says "Toggle Track Effects." Click this button to open the Track Effects Rack.
Once the Track Effects Rack is open, you'll notice a button at the bottom that says Pre-render Track. Clicking this button will turn on pre-rendering for the track. It will turn blue when enabled.
Step 5: Add Effects
Now that pre-rendering is enabled, any effects you add to the track will be pre-rendered. To add an effect, click on the empty slot in the Track Effects Rack, and choose an effect from the list. You can add up to 16 effects per track.
Step 6: Playback Your Track
Now that you've enabled pre-rendering and added effects to your track, you're ready to playback your project. Hit the space bar or click on the Play button in the transport controls. You should notice a smoother playback, even with CPU-intensive effects.
Wrapping Up
Enabling pre-rendering in Adobe Audition is a great way to ensure a smooth and seamless audio editing process. This feature is particularly useful when you're dealing with CPU-heavy effects or working with a project on a less powerful computer. So, turn on pre-rendering, experiment with your soundscapes, and let your creativity soar without worrying about system performance. Happy editing!
Questions you might be asking
What is pre-rendering Adobe Audition?
Pre-rendering in Adobe Audition is the process of generating a preview of audio or video processing effects before you export or save a file. This can be useful if you want to preview your edits or changes in real-time, or if you want to save time when exporting your final file.
How do I render audio in Adobe Audition?
Rendering audio in Adobe Audition is a simple process. Once you have made your edits or changes, go to the File menu and select Export. Choose the audio format that you want to export, such as WAV, MP3 or AIFF. Next, select the location where you want to save your file and click Export. Adobe Audition will then render your audio file and save it to the location you selected.
How do you render a video in Audition?
Adobe Audition is primarily an audio editing software and doesn't have the capability to render video files. However, you can import video files into Audition to work with their audio tracks. Once you have made your edits to the audio, you can export it along with the video file from your preferred video editing software.
How do I make Adobe Audition run faster?
There are several ways to make Adobe Audition run faster and more efficiently. Firstly, ensure that your computer meets the minimum system requirements for the software. Secondly, close any unnecessary programs and background processes that might be using up your computer's resources. Lastly, consider upgrading your hardware, such as your RAM, hard drive or processor, to improve the performance of Adobe Audition. Additionally, optimize the Preferences settings in Adobe Audition by selecting the appropriate hardware settings and increasing the audio buffer size.