I've had many frustrating moments using Blender to create 3D graphics trying to create transparent backgrounds. Creating an alpha transparent texture is difficult. It took me several tries to figure out the best way to do this, and today I want to share my findings with other program users.

This article explains how to use alpha transparent textures in Blender accurately. We know this kind of work can be intimidating, especially if you're new to 3D software, but if you follow our instructions, you'll get great results.
If you follow these instructions, you'll have no trouble using alpha transparent textures in Blender. Let's start...
Also read: How to Fix Pink Textures in Blender?
What are alpha textures in Blender?
You can give your materials transparency or translucency effects in Blender by using alpha textures. This can be used to make windows, glass, hair, or fur, among other things. A grayscale image with black (0) being fully transparent and white (255) being fully opaque makes up an alpha texture. In accordance with the pixel color value, you can also specify the degree of transparency or translucency (RGB).
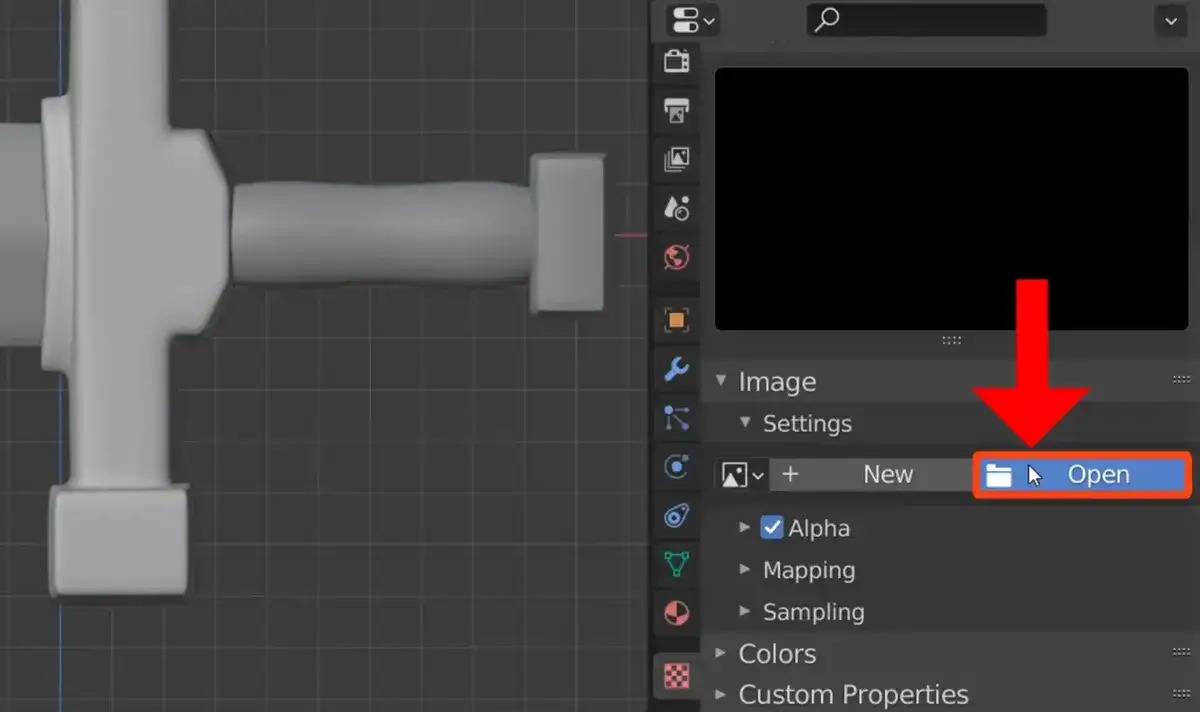
Simply add a new texture layer in the material settings tab, choose "image" as the type, and then select your alpha texture from your computer's file system to use it in Blender. After it has been loaded into the scene, you will need to configure a few settings, including its size and placement on the object, before rendering it as an animation, video, or image sequence.
If you have an advanced material setup that includes both diffuse channels and specular channels via nodes, alpha textures can also be used in Blender to control reflections and other lighting characteristics of a surface material. To accomplish this, a new node called "alpha channel" must be added. This node will control the amount of light that is reflected off of each part of the object based on the intensity values within the texture map's alpha channel, meaning that lighter areas will reflect more light than darker ones, giving you greater control over lighting effects of any given surface material in your scene!
You now understand how simple it is to use alpha textures in Blender. You too can create some amazing-looking materials that utilize transparency effects or even complex reflection patterns depending on what kind of project you're working on by correctly setting up alpha maps within your materials settings tab and taking advantage of node-based setups with advanced channels like diffused color layers combined with specular channels through nodes.
How do I use alpha textures in Blender?
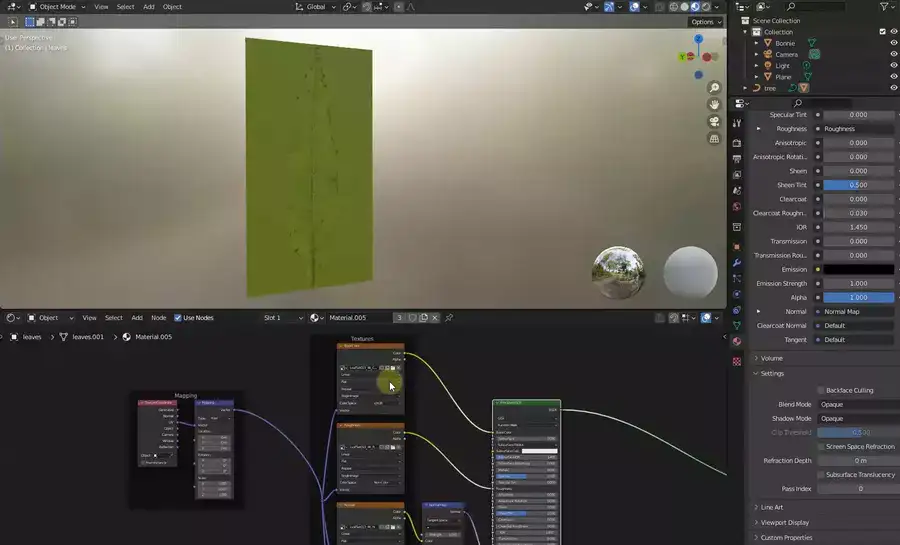
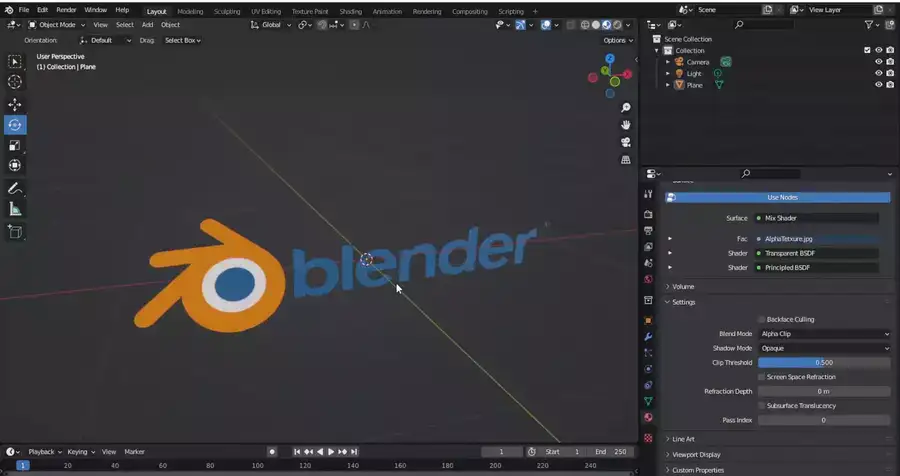
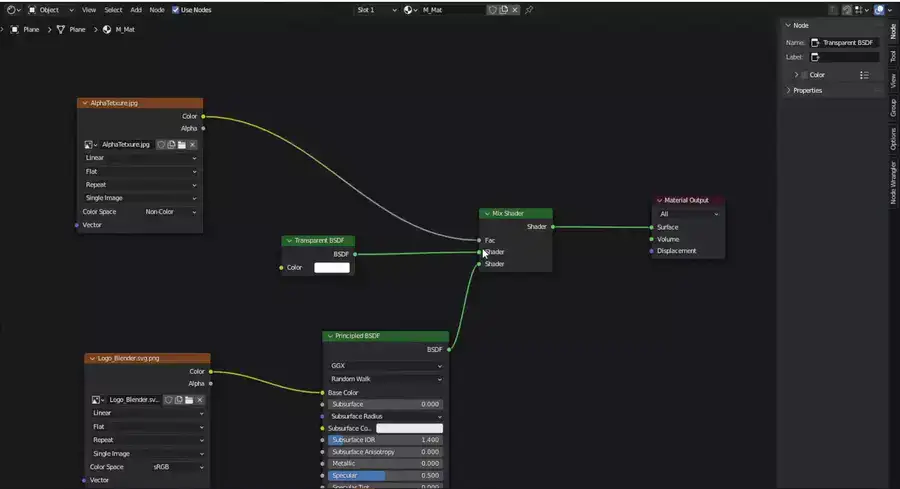
In the Shader Editor, basic object materials can be created. In my materials, I mix a Principled BSDF node with a Transparent BSDF node using a Mix Shader Node so I can control my base color and transparency levels separately. The Material Output connects to an Image Texture Node, whose Alpha output is connected to the Mix Shader Factor input slot to mix opaque/transparent values.
This means white areas in my texture will be opaque and black areas transparent. This gives me more control over how my material reacts when lit and viewed through a camera, which is crucial for achieving realistic results.
Related: How to Export Object with Texture in Blender?
If you want to learn how to use alpha textures in Blender, there are tutorials on YouTube and E-Books to help beginners get started. If you're feeling overwhelmed by all this technical talk, don't worry; it takes practice and time to become comfortable with these advanced features.
How do I use Alpha PNG in Blender?
Images saved as an alpha PNG format have areas that are transparent. Create a new material for your object in Blender before attempting to use Alpha PNGs in the program. After that, include an image texture node in the material, and when prompted, select the Alpha PNG that you want to use as your alpha texture. The last step is to make a connection between the image texture node and the diffuse BSDF node.
Why is Blender alpha texture not working?
First thing I'd check would be making sure that each face has its own UVs for accurate alpha texturing in Blender. Two overlapping faces with different textures may not render correctly from certain angles. Before using an alpha map to texture a model, check for overlapping faces. If you've added extra geometry using subdivision surfaces or mirroring, you must re-align your UVs so they don't overlap on the UV map image.
Incorrect normals on a mesh's vertices can also cause rendering issues with alpha textures in Blender, which rely on how light interacts with surfaces. To fix this, go into Edit Mode and press A until all affected vertices are highlighted; then press Ctrl+N to recalculate their direction based on their surrounding faces/edges and ensure they're facing outwards from your mesh as expected.
Also read: How to Render Faster in Blender?
Depending on the type of material you're texturing, you may need to adjust shader settings such as opacity or transparency. If these values are too high, an alpha map won't blend properly with the color or texture set up in the shader node tree editor window. Check that ambient occlusion hasn't been enabled, which could affect how your alpha texture renders on the mesh. These steps should improve Blender alpha texture results.