If you've been experimenting with Blender for 3D modeling, you are aware of how difficult the program can be. It can be intimidating to learn all the different features and tools available. The knife tool is one that is particularly challenging to comprehend. When attempting to become familiar with this potent tool, it's simple to become overwhelmed.

Be at ease, though! I'm here to demonstrate to you that working with the knife tool isn't as challenging as it first appears; all it takes is some practice and persistence. We'll cover all the fundamentals of using the knife tool in Blender in this article, from comprehending its capabilities to organizing your workspace to make the most of it.
Additionally, we'll break down and clearly explain each step of how to use the knife tool so that everyone, from beginners to experts, can understand what's happening and how each feature functions. As a result, by the time you finish reading this article, you'll have a strong foundation for getting started with one of Blender's most practical features and quickly and effectively producing high-quality models.
Also read: How to Cut Out a Shape in Blender?
What is knife tool in Blender?
This tool is an incredibly useful way for you to subdivide geometry, cut up geometry, draw lines, and even create closed loops and holes. Whether you're a beginner or advanced user of Blender, the Knife tool is something worth getting familiar with as it will help your workflow immensely.
The Knife tool can be found in Edit Mode of Blender's 3D Viewport. It allows users to cut up multiple objects at once and also draw connected straight lines on one object at a time - making it more powerful than just using the regular cursor for cutting up meshes. It's almost like having an extra scalpel in your pocket that you can use with confidence when needed.
To get started, just click on the famous Knife Tool header which is located near other Mesh editing options like LoopTools and Subdivide options. You'll see there are several options available with this great feature, such as setting cuts along existing edges (called 'Intersect'), cutting only selected edges ('Multi Cut'), and creating straight cuts across faces ('Single Cut'). You also have three different modes; Angle Constraint which restricts angles of cuts between 0-180 degrees; Midpoint which allows users to cut along existing vertices; and Last Cut which takes two separate sets of points from two different objects or meshes.
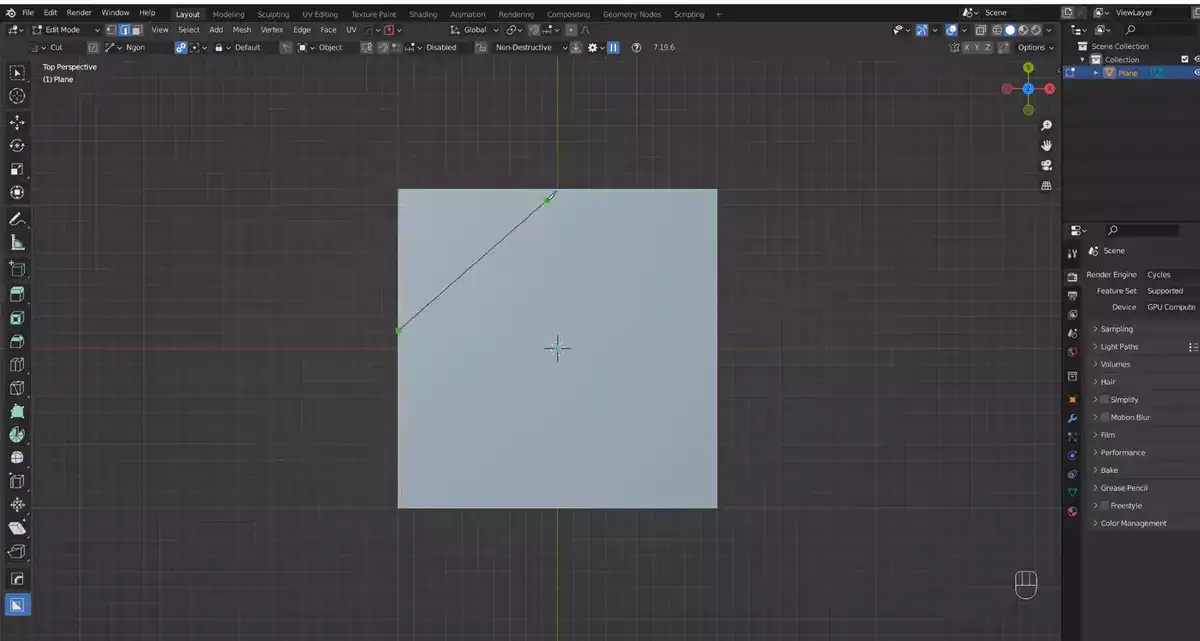
Once you pick a mode that works for your project, simply left-click (LMB) wherever you want to start drawing your line(s). As soon as you LMB somewhere else a green square appears indicating where the line begins; this is followed by red squares indicating where it ends whenever you LMB again - thus connecting these two points together for either defined cuts or freeform sculpting depending on what mode was chosen beforehand. Finally, simply left-click anywhere else in order to finish drawing the line(s). After that's done don't forget to press Enter or Return on your keyboard in order to confirm all changes made by the knife tool!
Related: How to Use a Lattice in Blender?
How do you snap a knife in Blender?
- Choose your knife tool first from the toolbar at the top. Then, click on the mesh's surface where you want to make the cut. By dragging across the surface or using the numerical values that are present in the bottom panel, you can change the cut's size. When you are satisfied with your choice, press "Enter" or "Spacebar."
- The next step is to make a new clamp object and place it so that one-half of your cut is securely resting against it. This will stop any unintentional movement during snapping and give you something solid to press down on your knife handle against. Once everything is in place, gently press down on either side of the knife until two distinct snaps can be heard coming from either side of the mesh.
- There you have it, then! You've used Blender to successfully snap a knife! This isn't always foolproof; adjustments may occasionally be required depending on the material you're working with and the precise location of your clamp; however, overall, this should be sufficient instruction for anyone wishing to try their hand at snapping knives in Blender.