There are various ways to adjust the volume in Premiere Pro. In this tutorial, we’re going to learn the 3 most effective ways. They are keyframes, audio volume gain, and auto-ducking.

2023 Update:
In this updated tutorial, we will explore the latest developments in adjusting audio volume in Adobe Premiere Pro in 2023. While the previously mentioned methods of changing volume gain, adding keyframes, and utilizing auto-ducking are still effective, there have been some notable advancements in this area.
Firstly, Adobe has introduced a new feature called "Intelligent Audio Balancing" which analyzes the audio clips in your project and automatically adjusts the volume levels to achieve a balanced and professional sound. This feature saves time and effort, particularly when editing long-form interviews or podcast-style videos.
Additionally, Adobe Premiere Pro now offers improved audio editing capabilities with the integration of artificial intelligence. The AI algorithms can detect and reduce background noise, enhance voice clarity, and optimize audio levels based on industry standards. This streamlines the process of achieving optimal audio quality in your videos.
Furthermore, the software now includes an extensive library of audio presets and effects that can be easily applied to enhance the overall audio experience. These presets range from equalizers and filters to spatial sound effects, allowing users to add depth and dimension to their audio tracks.
Change Volume Gain
For easy and quick volume adjusting, we recommend changing volume gain. This method works best when you don’t have dozens of different audio clips that require editing.
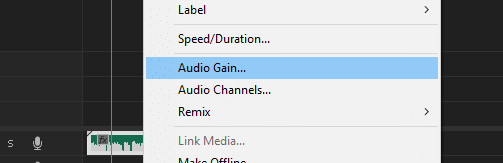
- Right-click on the audio clip you want to edit and find the “Audio Gain” option in the menu. It’s in the bottom half.
- There are quite a few options you can pick; let’s go over them.
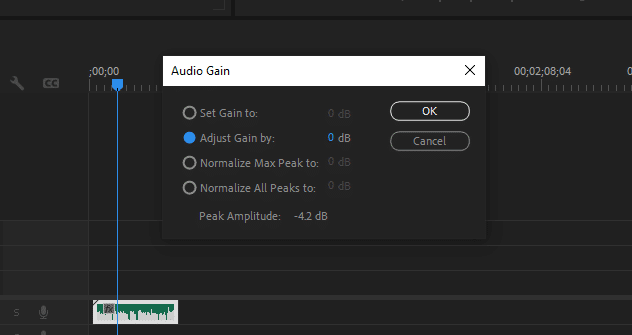
Set Gain To: That’s the setting we prefer mostly to set the audio clip dB to a specific value.
Adjust Gain By: Increases audio gain by percentage.
Normalize Max Peak To: Adjusts max dB for peak volumes in your clip. For example, you might have very loud sections in your clip, a VO talking around 10dB and suddenly saying something close to the mic in 30dB. That’s a very bad experience for your viewers and actually, makes headphone listeners quite angry.
Normalize All Peaks To: This option sets all peaks to a specified level similar to the above setting.
What should audio levels be in Premiere Pro?
There are a lot of factors to consider before adjusting the audio level of a clip. Did you edit the audio on another application, such as Audition? If you did and you liked the outcome, you’re better off leaving the audio level as is. If you’re recording voiceovers in Premiere Pro, you might sound very low, depending on your microphone. In that case, you should gradually increase the audio gain to find the optimal point. As you can tell, there’s no exact right answer. It all depends on your recording, voice, editing, and hardware.
For example, in our videos, we set the background music gain level to -28dB, so it doesn’t bother our viewers when the voiceover artist is talking. But it’ll be different for every voice, audio clip, and recording equipment.
How to Add Keyframes to Audio in Premiere Pro?
Premiere Pro allows you to add keyframes to your audio similar to clips. It allows us to create our own effects including fade-ins and fade-outs. Before adding keyframes to audios, click on the settings icon and make sure audio keyframes are turned on like in the image, otherwise, our changes won’t show up.
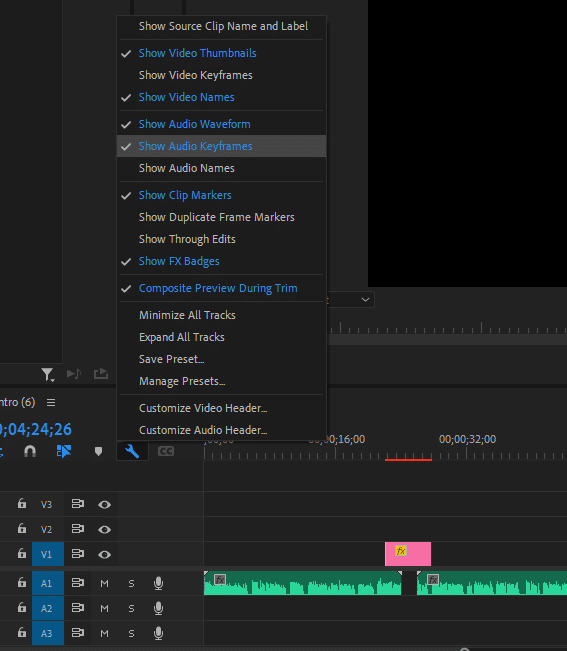
Expand audio track

Keyframes for audio normally aren’t visible. To have them appear, simply click on the border of your track and increase their height. You’ll see keyframes showing up once the track has enough space.
Volume keyframes
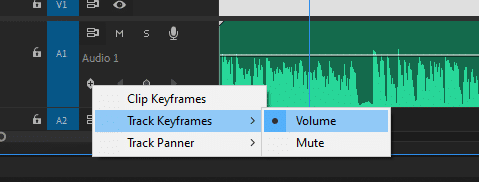
Change your keyframe type from clip to track volume or mute depending on the type of effect you want to achieve.
Add/Remove keyframe

Keyframes can be moved and replaced without actually removing and recreating a keyframe. All you need to do is click on the keyframe button in your timeline and drag it around. You could move it sideways or up and down.
Balancing audio levels for multiple clips in Premiere Pro
The best way to balance audio levels for multiple clips in Premiere Pro is using auto-ducking feature that comes with the latest versions of Premiere Pro. What it does is the program automatically adjusts audio levels for different types of audio. For example, you might have a voiceover with background music. All you need to do is define their types, and Premiere Pro will lower the volume of background music when your voiceover artist starts talking and increases the music between gaps. It saves an incredible amount of time if you are editing long-form interviews or podcast type of videos.
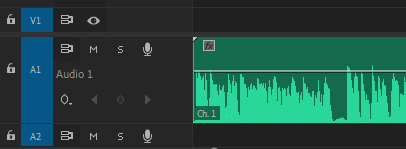
In the following scenario, for example, we have a voiceover on track 1, and background music on track 2. we are going to tell Premiere Pro what type of audio clips they are and let the software adjust the volume automatically.
- Go to Audio workspace.

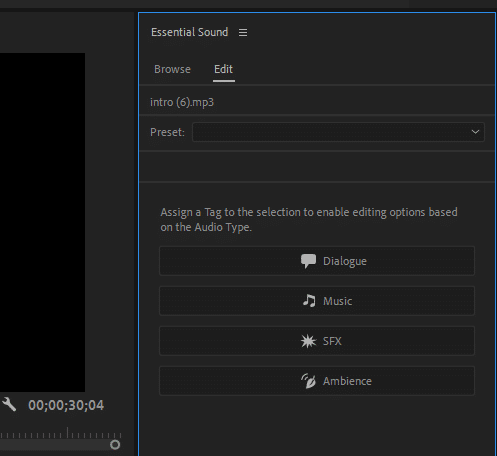
- Select the audio clip in your timeline. In our case, it’s the voiceover in our first track. In your Essential Sound panel, you’ll see a section letting you assign tags to audio clips based on their type. Since it’s a voiceover, we are going to click on Dialogue. But you can do anything else you like depending on your story. Music is for background music, SFX is for sound effects, and Ambience is for background ambiance sounds.
- Now click on the background music and select Music from the Audio Type panel. It’ll open a new panel like the following image.
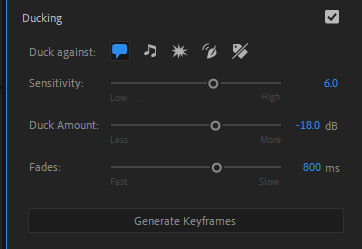
- Enable the ducking option and select Dialogue from the Duck Against menu. You could change sensitivity, duck amount, and fade value. When we are using this, we set the duck amount to -25dB and don’t touch Sensitivity and Fades values, but it’s up to you.
- Once you are done with the settings, click on Generate Keyframes, and Premiere Pro will automatically create and apply to duck keyframes for your audio clips.
In this tutorial, we talked about the 3 best ways to adjust and change audio volume in Premiere Pro. Did it help you achieve what you were looking for? Is there any other question we can answer for you? Let us know in the comments below!