
If you are anything like me, you don’t always pack a tripod to your trips, and most of the time shooting running and on the go. As a result, we end up with a shaky footage that doesn’t look like anything you’d be proud of.
Well, in this tutorial, we are going to go over how to stabilize shaky footage within Premiere Pro, without needing a more complex app such as After Effects.

So let’s get to the steps;
- Launch Premiere Pro and import the video clip you wish to stabilize.
- Select the section of the clip that needs to be stabilized and build a sequence for that section. If you want the effect to be applied to the full clip, you may just drag & drop the clip into your timeline and it would be applied.
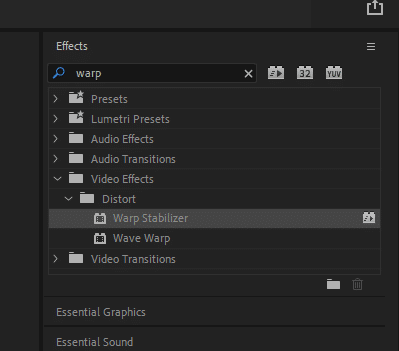
- Navigate to your effects bin and then put warp stabilizer into the search box. To apply it to the sequence automatically, you simply double-click on it. In addition, you could drag and drop it onto the clip if you want.
- At this point, the warp stabilizer effect will become active and start doing its magic right away. However, if you go to your effect controls panel and scroll down, you’ll find a slew of settings that allow you to have greater control over the result. The methods and frames that are automatically implemented are very effective. You shouldn’t have to fiddle with any of the settings very often, but if things start to go a little crazy for you, you may have to fiddle with them a little bit.
For example, Premiere Pro automatically applies “Smooth Motion”, for the best stabilization effect, however, you could also choose “No Motion” and what framing methods it should be using instead of “Stabilize, Crop and Auto-scale”.

What ever your computer specifications are, Warp Stabilizer is a resource-intensive bit of technology. Depending on your RAM and the length of the clip, the process will take a few of minutes to complete, and sadly, there isn’t much that can be done to make it go faster, apart from perhaps upgrading your RAM.
So there you have it: a fast method for stabilizing shaky video inside Premiere Pro. It’s as important as removing green screen from your Clip in Premiere Pro. Until next time, everybody.
