Do you prefer creating your video, audio or text templates, and do you want to use them multiple times? You must then know how to duplicate a clip, audio or text.
You may have only copy-pasted the title file, which did not work. This is because you changed the source of the copy-pasted text.
Knowing the shortcuts is one of the easiest ways to learn how to duplicate clips, audio, or text in Adobe Premiere Pro.

Related: How to add keyframes in Premiere Pro
Stay with us and follow these two simple and easy steps on how to duplicate a clip in Premiere Pro.
- Select the "alt" key continuously for a few seconds.
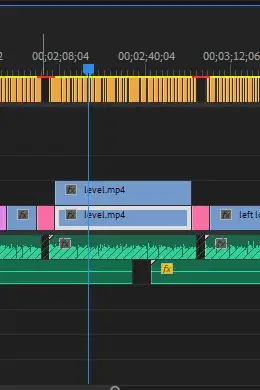
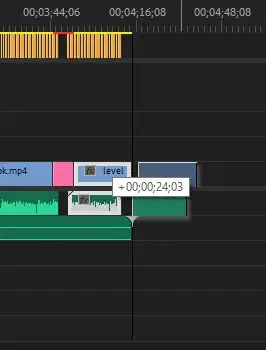
- Click and drag your video to a new position in the timeline vertically or horizontally. This will duplicate your clip immediately.
How to Duplicate a Part of the Clip
If you want to duplicate a part of the clip and not the whole video. To do this, follow these steps.
- Select the alt key, hold, then choose a part of the clip you wish to duplicate. The clip and audio are synchronized; hence duplicating the video will also duplicate the audio.
- Drag the selected portion of the clip to a new location in the timeline.
Duplicating the clip using these steps will separate the desired portion of the video without removing the clip's link from the beginning.
Related: How to nest or unnest a clip in Premiere Pro
Duplicate clip Premiere Pro shortcut
The quickest way to duplicate clips in Premiere Pro is using keyboard shortcuts.
- Select the clip.
- Hold the alt key and drag.
- Drop in the desired location.
As easy as pie!
How to Duplicate an Audio Clip in Premiere Pro
You can't duplicate audio clips as they are in Adobe Premiere Pro.
However, if you duplicate a video clip, the audio will also be automatically duplicated because they are synchronized.
Premiere Pro alt + drag is Not Working.
If ALT + DRAG isn't working to duplicate your clips, ensure you are careful to release your click on the mouse before releasing the alt key.
If this option does not work, your last resort will be to rest preferences files. This will reset Adobe Premiere Pro to its default settings.
Be careful as you rest preferences because this will undo most of the customization edits you had done.
However, some changes will be maintained, such as those you made to the audio hardware.
Here are the steps to reset preferences files.
- While launching Premiere Pro, press Alt (Windows) or Option (Mac OS) and release when the splash screen appears.
- To reset preference files, as the application is starting, hold Shift-Alt (Windows) or Shift-Option (Mac OS), then release when the splash screen appears.
- The preferences will have been reset correctly if you do not see a list of your recent drafts on the splash screen.
Remember, nothing will happen to your project files; only the recent directories will be wiped off.