
If you have a YouTube channel, the only way to get those views is by posting high-quality videos and exporting them in the correct format.
You may be an exceptional video editor, but are you exporting the videos from Premiere Pro in the right format and quality?

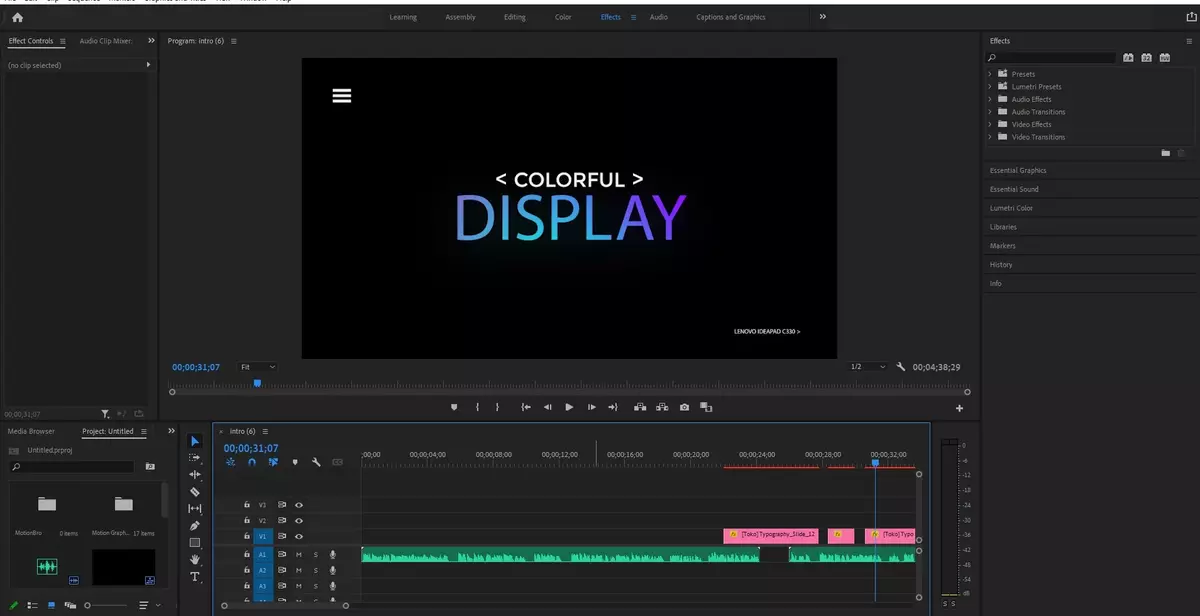
You have made your edits, and your video looks professional and cinematic. There's one more step remaining, exporting the finished video from Premiere Pro.
Numerous settings bombard you when it's time to export that clip. However, do not fret because it's not as hard as it may look.
A little knowledge of sequence settings and codex will make you a pro video exporter in no time using these steps.
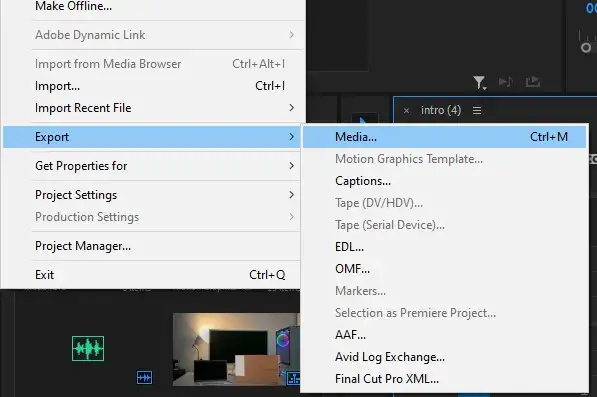
- Go to File > Export > Media or click Ctrl + M on PC or Cmd + M on Mac and select the sequence you wish to export. This will open the Export Settings window.
- Select the desired presets for the YouTube video before sending it to the Media Encoder for exporting. To help the rendering process, ensure that all other apps are closed.
- If you wish to maintain the original settings of the video, click Match Sequence Settings.
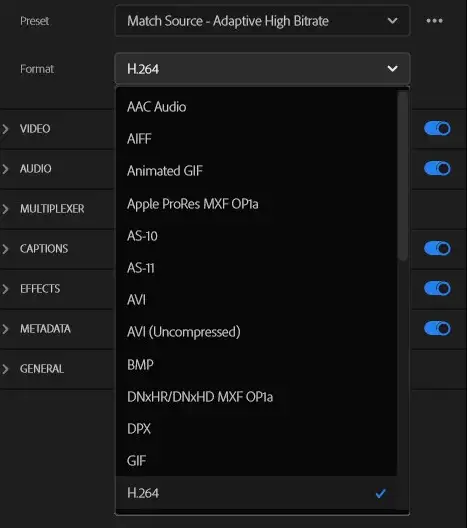
- If you choose custom settings, continue select H.264 codec, which is the best for video playback.
- Select a preset that matches your sequence and desired output.
- Fine-tune your settings and adjust the Bitrate in the file size you desire.
- Check the export video and export audio to ensure they are in the video.
- Select either of the two export options: Export or Queue.
- Queue will send you to the Media Encoder, then press the green play button to begin exporting. It is the best option if you wish to export multiple sequences or work in the background.
- Export will start exporting right from that window, and you will not be able to work in the background.
- If you often use custom settings, ensure you save the settings for future exports by clicking the Save Preset button next to the preset drop-down in the export window.
What is the Best Format to Export from Premiere Pro to YouTube?
The best format to export from Premiere Pro to YouTube is the MP4 format, and these are the basic parameters you must adhere to.
Related: Best YouTube video editors
- 4K maximum resolution.
- The video frame rate should be the same during recording, encoding and uploading.
- 384kbps (stereo) bitrate.
- 44-56 Mbps (for Standard Frame Rate) and 66-85Mbps (for High Frame Rate) for the best video bitrates for 4K HDR clips.
- AAC-LC for the best audio codec.
Here is a table that will guide you on the best export settings for 4K, 1080P HD and 720P.
How do I Export HD from Premiere Pro for YouTube?
- Go to File > New > Sequence or press Ctrl + N to select a sequence preset similar to the video settings you used when filming.
- Name your sequence, then click OK.
- Edit your video normally in the timeline.
- Set your 'in' and 'out' points.
- Select Ctrl + M or go to File > Export > Media to begin exporting your video.
- Under the Export Settings, next to format, select H.264.
- Choose Custom for presets.
- Click the blue text near the Output Name and choose a name and location to save the video file.
- Check the Export Video and Export Audio boxes.
- Under the Export Settings, select Video Tab and Level to 4.2 and Profile to High.
- Set the Height to 1080 and Width to 1920.
- Set frame rate to 23.976, then check the Render at Maximum Depth.
- Go to Bitrate Settings and set the Bitrate Encoding to CBR and the Target Bitrate to 45.
- At the bottom, check the Use Maximum Render Quality.
- Change your audio settings by clicking Audio Tab under Export Settings, then change the audio format to AAC.
- Under Basic Audio Settings, set Audio Quality to High, Channels to Stereo, Sample Rate to 48000 Hz, and Audio Codec to AAC.
- Under the Bitrate Settings, set Bitrate to 320kbps.
- Save your presets.
- Export your video.
Can I Upload H264 to YouTube?
Yes, you can upload H264 to YouTube. The recommended video format is MP4 using H 264 codec with a standard aspect ratio of 16:9.
Should I Use H 264 or H 265 YouTube?
H 265 is the best for YouTube videos only if your encoder can stream in this standard.
The main difference between these two is how they process information, the resulting video file size, and each standard's bandwidth consumption.
H 265 will allow you to post YouTube videos with the highest 4K quality.
Is 1080p Good Enough for YouTube?
Yes. This is the best choice for YouTube. 2.7K is not recommended, and 4K might be too huge as it takes ages to upload. However, 4K will produce the best quality pictures.