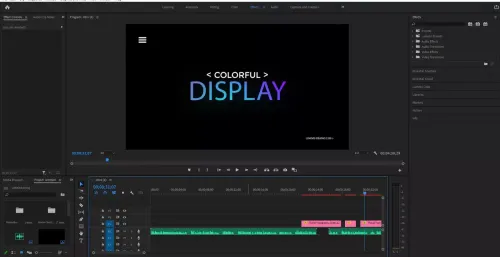
MP4 format is one of the most used export formats in Premiere Pro. However, there are dozens of others options and it might be confusing which one will actually render your video as MP4. In this tutorial, I'll show you step by step how I render my videos in 1080P or 4K in MP4 format.


How to export Premiere Pro to MP4 in 1080p?
You can export your Premiere Pro footage in MP4 in a few easy steps. As long as you know what you are looking for because you won't be seeing "MP4" in format settings.
To export your File to mp4 1080p in Adobe Premiere Pro, follow the steps below:
- Find the menu bar and then click File> Export > Media.
- When the window opens, select your required setting for a new task. Keep the Match Sequence Setting unchecked, but ensure that Export Video and Export Audio boxes are checked.
- Select H.264 from the Format dropdown box. As you can see next to the Output Name, this will create an MP4 file.
- Next, select the Preset option; you will see many video quality options, simply choose High-Quality 1080p HD and then click on the Export option.

Adobe Premiere Pro won't export MP4
There can be many reasons Adobe Premiere Pro won't export your File. If you cannot find them, then these ideas can help you.
- Restart your PC: Simply restarting your computer will resolve any existing problems, allowing you to export with ease.
- Make sure you have enough storage.:There's a possibility your computer's storage is packed, which means you won't be eligible to export from Premiere Pro. Try again after clearing some space.
- Close all programs: Close any other programs attempting to access the File or the Premiere Pro folder. This would then would allow you to export the video.
- Check for folder permissions: Check for folder permissions in Premiere Pro.
- Review your media and check for any corruption: Another issue that can make exporting a clip in Premiere Pro difficult is media corruption within the program. You'll need to disable all but one track to fix this. The video should then be exported. Carry on like this for each track until you find the one that won't export.
- Use the Adobe cleaner tool: If you're having trouble exporting your video in Premiere Pro, the Adobe cleaner tool is worth a look. This effectively removes old and corrupted versions of Premiere Pro, resolving any underlying problems with the software.
- Check updates for Premiere Pro: Adobe's software constantly updates its software, which is excellent, but it can leave you a version or two behind. However, if you're having trouble exporting, check if there's a new version available.
Where did Premiere Pro export my mp4?
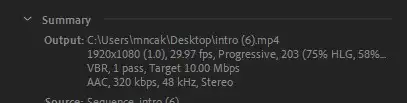
Normally, Premiere Pro exports your files wherever you have saved the project. However, it can be changed and viewed in export settings. Click on CTRL + M to access export settings and locate the output section in the summary tab. There you'll see the exact location Premiere Pro will export your MP4 file.
Generally, Adobe premiere pro exports your File to the output file you selected when exporting your task; if you didn't adjust it, it was set to the output file of your previous project by default.
To find your exported file go to PCs file >select search option> place the file name, you will get the File or check the last folder you used for exporting your File from Adobe.
If you forgot to change the name in Adobe, check by File>export>media; you will see the output name option. Save your file name there to find it easily.
That's all for this tutorial everyone. It was a short one. Give it a try and let us know in the comments how it goes.