In this tutorial, we are going to learn how to make text fade in and out effects in Premiere Pro. You can also apply this method to other transition effects apart from fading. If you set fade transition as your default, you could very quickly apply the effect on all your texts using CTRL + D keyboard shortcut. Please make sure you’re using the latest stable version of Premiere Pro to ensure we all have access to the same features.

How do you fade in and out in Premiere Pro?
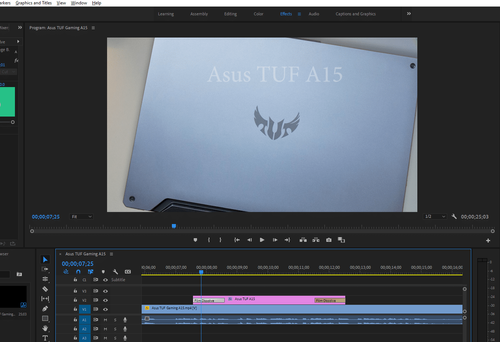
Of course, start your project by firing up Premiere Pro and inserting a clip so we have a sequence we can work on.
- Move the play head to the location you want to add your text
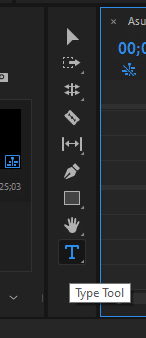
- Select Type tool from your tools panel. As a short cut you could also use CTRL+T
- Click on anywhere on the clip to place your text area and type the text you want to add fade in/out effect. It’ll be inserted into your sequence right away.
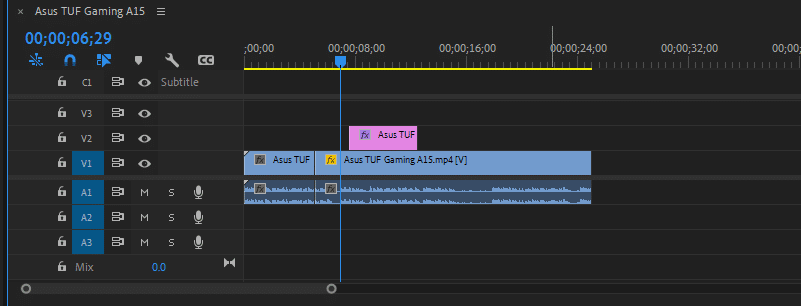
- If you have the fade-in effect selected as your default transition effect, click on the text and press CTRL+D to quickly apply it.

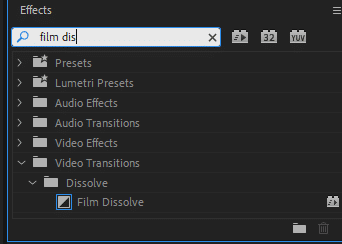
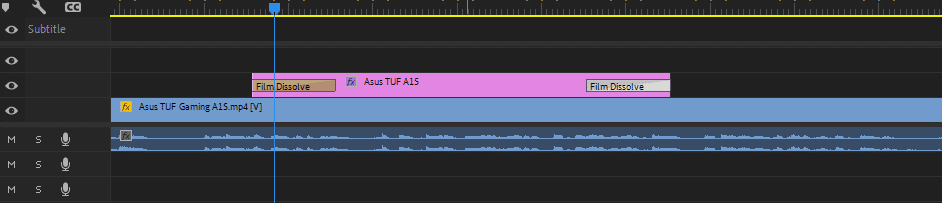
- If you haven’t set up a favorite transition effect for your Premiere Pro, go to Effects Panel > Video Transitions > Dissolve and find Film Dissolve. Alternatively, you could also search the effect name in the search bar.
- Once you find it, drag and drop it onto the text in your sequence. There are dozens of highly cinematic transitions available in Premiere Pro, so be sure to check them all.
Can you fade captions in Premiere Pro?
There isn’t a quick way to add fade transition effect to captions and subtitles Premiere Pro automatically generates. However, if you are manually creating them using text, adding a fade effect is very simple. Just select the transition you wish to apply and drop it in between the text. If you have a favorited transition effect, you could select your texts and press CTRL + D. It’ll automatically apply your default selected transition. Check our Premiere Pro captions tutorial to learn how to generate subtitles using predefined styles.
How do I shorten an effect in Premiere Pro?
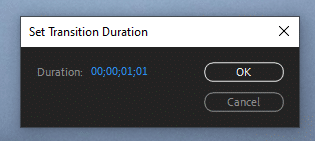
By default, most transition effect durations are set to 1 second, including fade in and out. That means it’ll take a second from your chosen transition’s beginning to end. However, just like any other clip, you can also make the transitions shorter or longer, depending on the effect you are trying to achieve. Zoom in on the sequence until you have a bigger playing field like in the image.
Next, double-click on the transition. A new pop-up window will appear, allowing you to set a custom duration for your effect. For a quicker way, you could also grab them by their sides and drag them around to roughly set their length.
That is it for this tutorial. We covered 2 ways to add transitions to your texts. Please feel free to let us know in the comments if we have missed something or if there’s any other tutorial you want us to talk about.