Adobe Premiere Pro’s default timeline provides plenty of space when you have a few minutes of video in length. But as your project gets complicated as you start adding more texts, clips, pictures, and effects, you’ll need to be able to zoom in on the timeline to fine-tune and make small adjustments in your media files. That’s where you’ll need to zoom in on the timeline, and in this tutorial, we’ll learn exactly that.

There are two ways to accomplish this, we’ll cover them both.
Zoom and scroll in the timeline
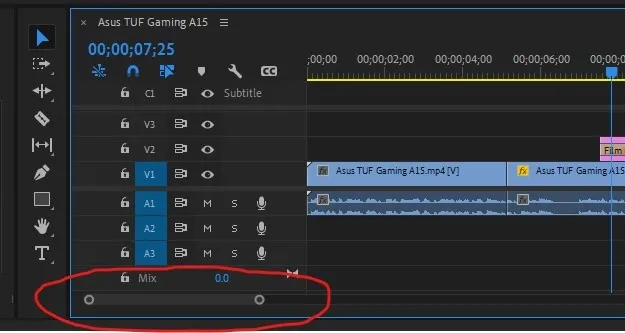
The first way to zoom in on the timeline is to use the slider. Locate the slider function you see in the image. Grab it by the sides and drag it. If you wish to zoom in on the timeline, shorten its size. And to zoom out the timeline, just increase its length. When the slider is as wide as the timeline itself, it means you’ve zoomed out to the most possible extent.
The same button also lets you focus on different sections of the timeline. First, zoom in on the timeline using the method we explained, click on the slider's center and move it around. It’ll allow you to scroll to different sections of the timeline. You could also scroll the timeline with a shortcut by pressing “Shift+mouse wheel”. Both do the same job, although the shortcut is a bit slower. I recommend using the shortcut when you need to scroll incrementally.
Shortcut for zooming in and out in Premiere Pro
There’s a shortcut for everything in Premiere Pro, and expanding the timeline is no exception. To zoom in and out on your timeline, use your ALT+Mouse wheel. Turning the mouse wheel towards yourself while pressing the Left ALT button will zoom out while turning it in the opposite direction will zoom in.
This is it for this tutorial. I hope we were able to explain how to zoom in and out of the timeline on Premiere Pro. Please note that the methods explained here will also work on other Adobe video editors, including After Effects and Premiere Rush in both Windows and iOS versions.
Good luck!
