Video editing is a process that can be both creative and challenging, and often times it is both. Whether you're an amateur filmmaker shooting TikToks on your phone or a professional video editor making edits for a living, there's no doubt that you've had to deal with blurry video at some point or another.
It is a bit hard problem to tackle, there there are still a few things that you can do to try and fix it. In this article, we'll go over a few different ways how to fix blurry video in Premiere Pro.

Also read: How to blur faces in Premiere Pro?
Can you fix blurry video in Premiere Pro?
First, let's answer whether it's possible at all. The answer to this question is "yes" with a "but". It might not be as simple as you think. The reason your video is blurry is that your footage doesn't have enough pixel information and you're viewing it in a way bigger resolution than you're supposed to. You can apply special sharpening effects, but you can certainly not create pixels out of thin air unless you use special AI video enhancers that try to guess missing pixels and enhance the overall quality by generating new pixels. However, the results with these software are often hit-and-miss.
We'll be looking at two methods to end up with sharper videos:
- Use sharpening effects
- Render in a lower resolution so it matches your original footage resolution.
- If you think blur was caused by a shaky camera, use the video stabilization feature of Premiere Pro.
- Use AI video enhancers.
Why is my video blurry in Premiere Pro?
There are a few different reasons why your video might be blurry in Premiere Pro. One of the most common reasons is that your footage was recorded in a lower resolution than what you're trying to edit it in. Let's imagine that you've recorded your footage in 720p resolution but are trying to edit it in 1080p, your footage is going to look blurry. This is because when you upsize footage, it becomes pixelated and fuzzy. The best way to avoid this problem is to make sure that your footage is recorded at the same resolution that you're going to be editing it in.
Also read: How to do motion tracking in Premiere Pro?
Another common reason for the blurry video is because of the camera shake. This can happen if you're hand-holding your camera or if there's any kind of movement while the camera is recording. The best way to avoid this problem is to use a tripod whenever possible. Lastly, another common cause of blurry video is because of compression artifacts. This happens when your footage has been compressed too much, which can happen if you're using an older camera or if you're recording in a lower-quality setting. The best way to avoid this problem is to make sure that your footage is recorded in the highest quality setting possible.
How to sharpen video in Premiere Pro?
Now that we've gone over some of the most common causes of blurry video, let's take a look at how to fix it. One of the first things that you can try is to use the Sharpen effect in Premiere Pro.
Sharpen Effect in Premiere Pro
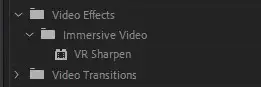
This effect can be found under the Effects panel and can be applied to your footage by dragging and dropping it onto your clip.
In your effects panel, search for "Sharpen" and "VR Sharpen" effects should appear under Immersive Video tab.
Once you've applied the effect, you'll need to adjust the amount of sharpening that you want to apply. You can do this by adjusting the slider under the Effect Controls panel. Another thing that you can try is to use the Unsharp Mask effect. This effect can also be found under the Effects panel and can be applied to your footage in the same way as the Sharpen effect. Once you've applied the effect, you'll need to adjust the amount of sharpening that you want to apply. You can do this by adjusting the slider under the Effect Controls panel.
Also read: How to add shapes in Premiere Pro?

Lastly, another thing that you can try is to use the High Pass filter. This filter can be found under the Effects panel and can be applied to your footage in the same way as the Sharpen and Unsharp Mask effects. Once you've applied the filter, you'll need to adjust the cutoff frequency. You can do this by adjusting the slider under the Effect Controls panel.
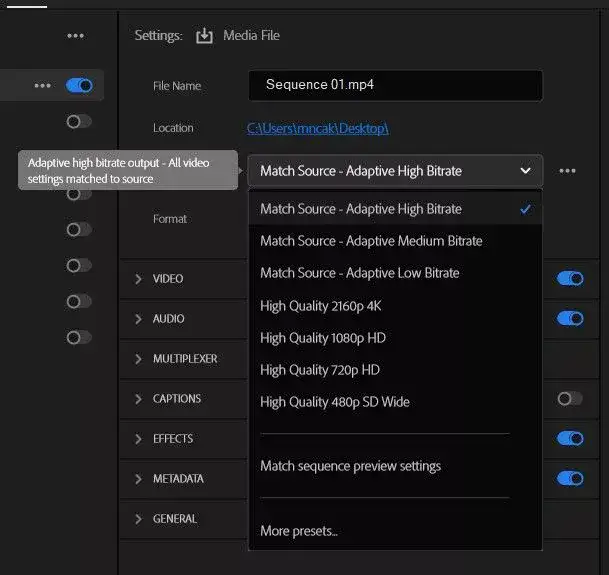
Change your render resolution
As we've mentioned above, you'll end up with a blurry and distorted video if your videos render pixel resolution doesn't match that of your footage.
For example, if your footage is recorded in 720P, rendering it in 4K ultra HD will result in the badly blurred video. Simply because your seed footage doesn't have enough pixel data to support higher render qualities.
Unfortunately, there isn't much you can do about it if that's the case except render in the original footage resolution.
Use Warp Stabilizer to fix blurry footage
There is a chance the blur in your video is caused by a shaky lens and camera. If that's the case you could easily fix it using Premiere Pro Warp Stabilizer. You should definitely check out the process by following the link.
In short, it fixes the shake in your footage after you've done taking it. You'll be surprised by the results.
Use AI video enhancers
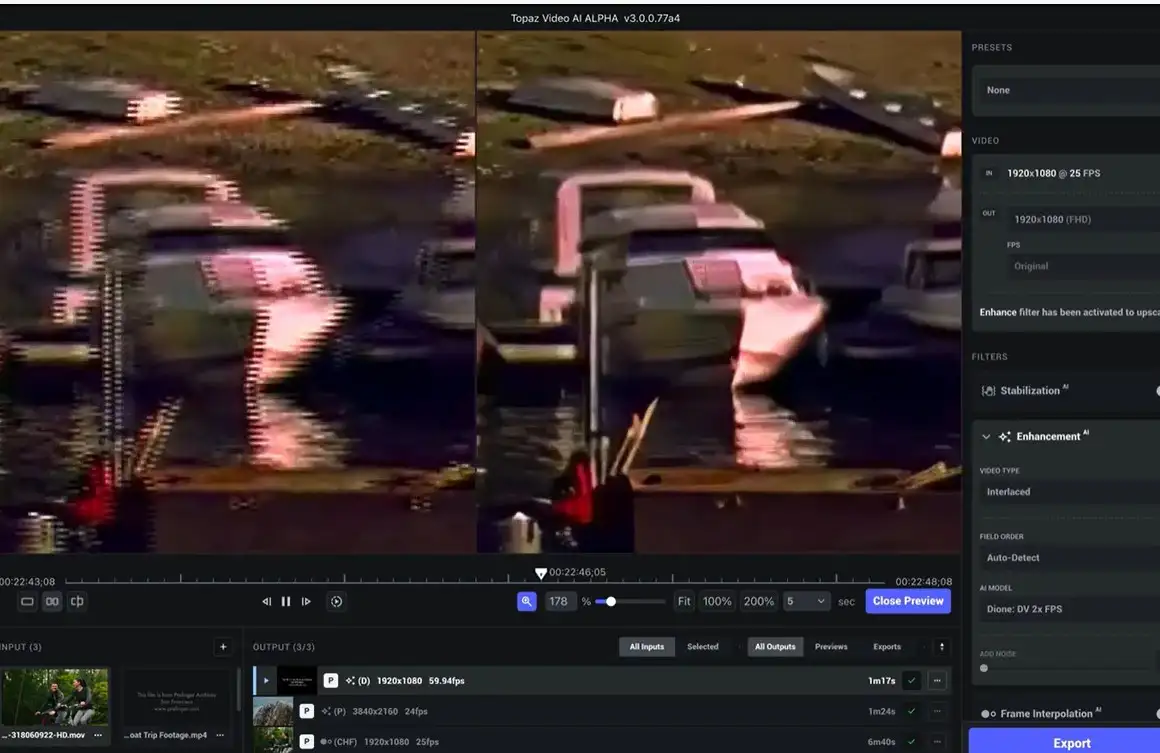
There are a few AI-powered services that claim to enhance and upscale your images and videos. Image manipulation has come a long way in the past few years and there are a lot of proven services that take your blurry and small footage and turn it into a crystal sharp video up to 4K resolution at 60FPS.
Topaz Video AI is one of them. Although it comes with a steep price tag of 300 dollars, you could try it for free and see if it'll get the job done!
Conclusion:
In conclusion, there are a few different ways how to fix blurry video in Premiere Pro. The best way to avoid the problem is to make sure that your footage is recorded at the same resolution that you're going to be editing it in. Another thing that you can try is to use the Sharpen, Unsharp Mask, or High Pass filter to try and fix the problem.