You can adjust the volume of each clip individually or group them into a single master clip volume. In addition, you can also apply a fade effect to the clips. This helps eliminate volume irregularities in your video, such as sudden increases in volume like an explosion which could be a dreadful experience for your viewers with earbuds on. In this tutorial, we'll explore how to lower the volume on Premiere Pro without using 3rd party Audio Editing software such as Audition or Audacity.

Also read: How to Adjust Volume in Premiere Pro?
How to Lower Volume/Audio on Premiere Pro?
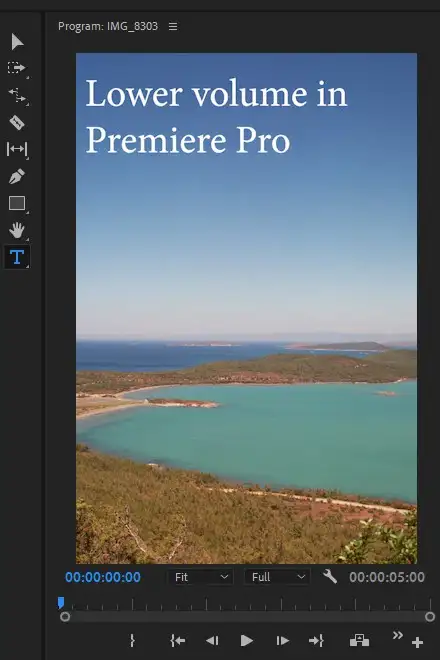
Step 1 - Open up the Effects Control Panel
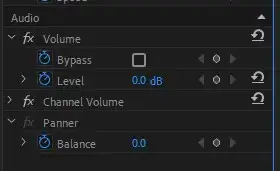
The easiest way to lower the volume of your video is to go to the Effects Control Panel and select "Volume," it should be located under the Audio menu. This option allows you to change the overall volume of your clip without affecting the pitch.
Step 2 - Change the volume manually.
If you want to make changes to the volume of your video outside of the Effects Control Panel, you can just type in the amount you'd like the volume to be lowered to into the field next to "Volume."
You can also drag the slider bar to your preferred volume. To return the volume back to normal, simply move the slider bar back to zero.
Also read: How to Remove Wind Noise in Premiere Pro?
What is Audio Gain?
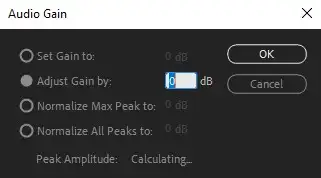
Audio gain level, in broad terms, is the amount of amplification that an audio system receives before being sent to speakers. This can be measured in decibels (dB). For example, if you have a speaker set at 50 dB, then your amplifier would need to output 100 dB for that speaker to reach full volume. In Premiere Pro or another video/audio editing app, Audio Gain pretty much refers to the loudness and audio levels of a clip.
Does Gain Increase Volume in Premiere Pro?
Audio gain refers to the loudness of your clip, and increasing the gain is the easiest and fastest way to increase volume in Adobe Premiere Pro. The best part is, using the audio waveform, you could add gain to specific parts of your video and control the volume of only the audio track parts you've selected. For example, you could be adding background music to a voiceover, and in between sentences and long pauses, you could manually or automatically increase background music input levels.
Related: Fix out of sync audio
You could alternatively use Premiere Pro's audio ducking feature to automatically control sound levels and track levels of your source clips. It detects your audio effects, sound effects, dialogue clips, and music tracks. Then programmatically sets base levels and audio level peaks. Since we have a separate tutorial on that, we won't go into further detail here.
What audio volume should YouTube videos be?
There isn't a one size fits all type of exact answer to this question since each video to its own. But there are still general guidelines you should be following. In TV, it's recommended to have a max peak of -12 dB of volume adjustment across the video. Please note that loudness (LUFS) and volume (dB) aren't the same.
What's perhaps more important than volume is True Peaks. It refers to the loudest parts of your audio. In other words, the maximum level your audio clip signals reach. An example would be an explosion or someone shouting. You should be identifying these moments and bringing their gain down to normal. All in all, it's best to keep your audio meter between -12db to -20db. If you're looking to create a professional-sounding video, try to stay above -20dB.